Play WebRTC stream in iOS
Step 4: Play WebRTC Live Stream in iOS
Playing a WebRTC live stream in your iOS application is straightforward once you have created the project and published a stream. Follow these steps:
1. Edit ViewController.swift
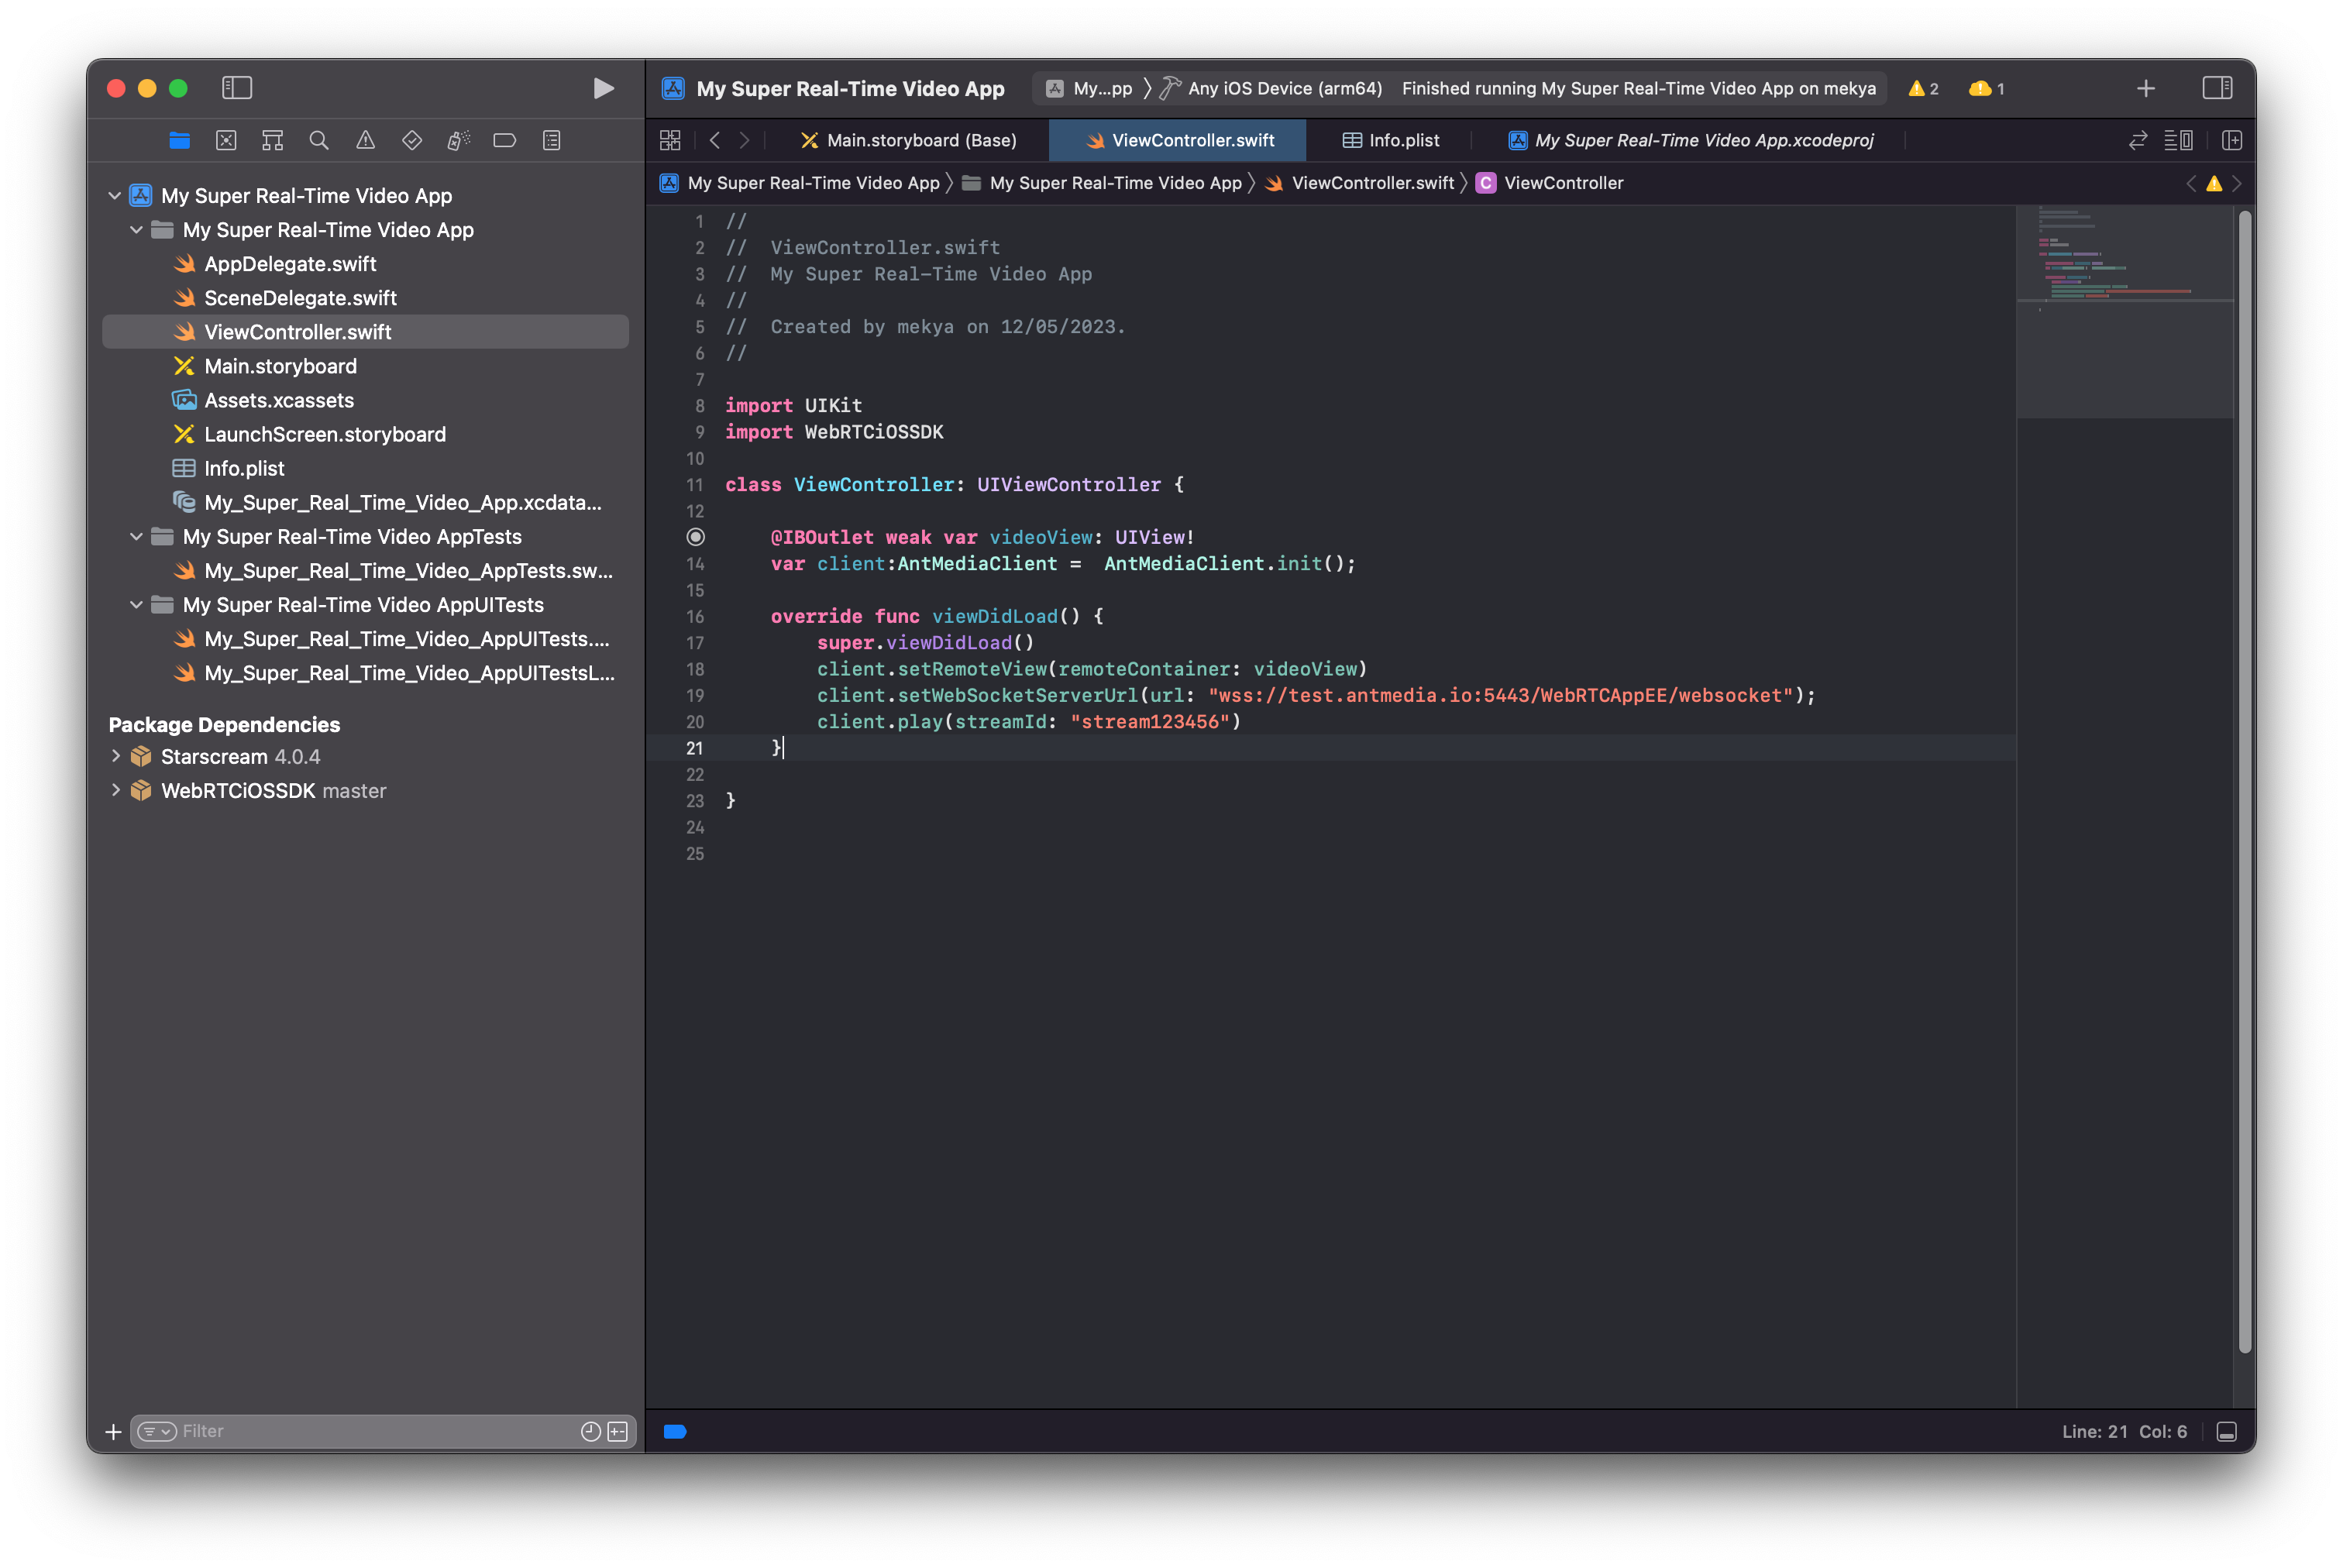
Replace your current code with the following snippet to configure the client to play a remote stream:
import UIKit
import WebRTCiOSSDK

class ViewController: UIViewController {

    @IBOutlet weak var videoView: UIView!
    var client:AntMediaClient =  AntMediaClient.init();

    override func viewDidLoad() {
        super.viewDidLoad()
        client.setRemoteView(remoteContainer: videoView)
        client.setWebSocketServerUrl(url: "wss://test.antmedia.io:5443/WebRTCAppEE/websocket");
        client.play(streamId: "stream123456")
    }
}
2. Start Publishing the Stream
-
Visit the WebRTC Publish page
-
Enter
"stream123456"in the input box and click Start Publishing to make the stream available.
3. Run Your iOS Application
- Launch your app on a real iOS device. The client will connect to the WebRTC server and play the published stream.

4. Congratulations!
You have successfully played a WebRTC live stream on your iOS device.
5. Next Steps
-
Explore additional features and samples from the WebRTC-iOS-SDK repository
-
In the next guides, you will learn how to implement screen sharing in your iOS applications using the same SDK.