Ant Media Server Unity WebRTC SDK
Ant Media Server Unity WebRTC SDK is built on top of the WebRTC for Unity packages. The project includes a sample application demonstrating its use. This guide assumes Unity is already installed on your computer.
I assume that you have already installed Unity on your computer.
Setup The Project
-
Clone the Unity SDK project from github repository:
git clone https://github.com/ant-media/WebRTC-Unity-SDK.git -
Start Unity Hub
-
To open the project, click the Open button, then select the folder where you cloned the Unity SDK. Wait until the project opens in Unity.
-
Navigate to the Project window and open the AMSStreamingSample scene from
Assets/AntMedia/Samples.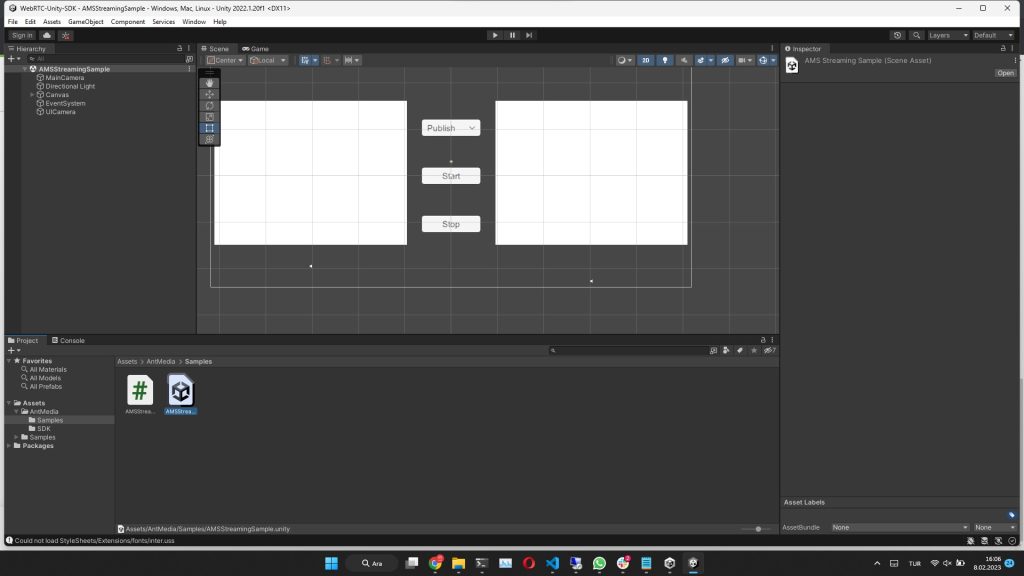
-
Edit AMSStreamingSamples.cs located in the same path.
- Set Ant Media Server websocket UURL according to your running AMS URL by editing the following line:
string websocketUrl = "ws://localhost:5080/LiveApp/websocket";- Set stream id by passing as the first parameter to the WebRTCClient constructor.
Build The Project
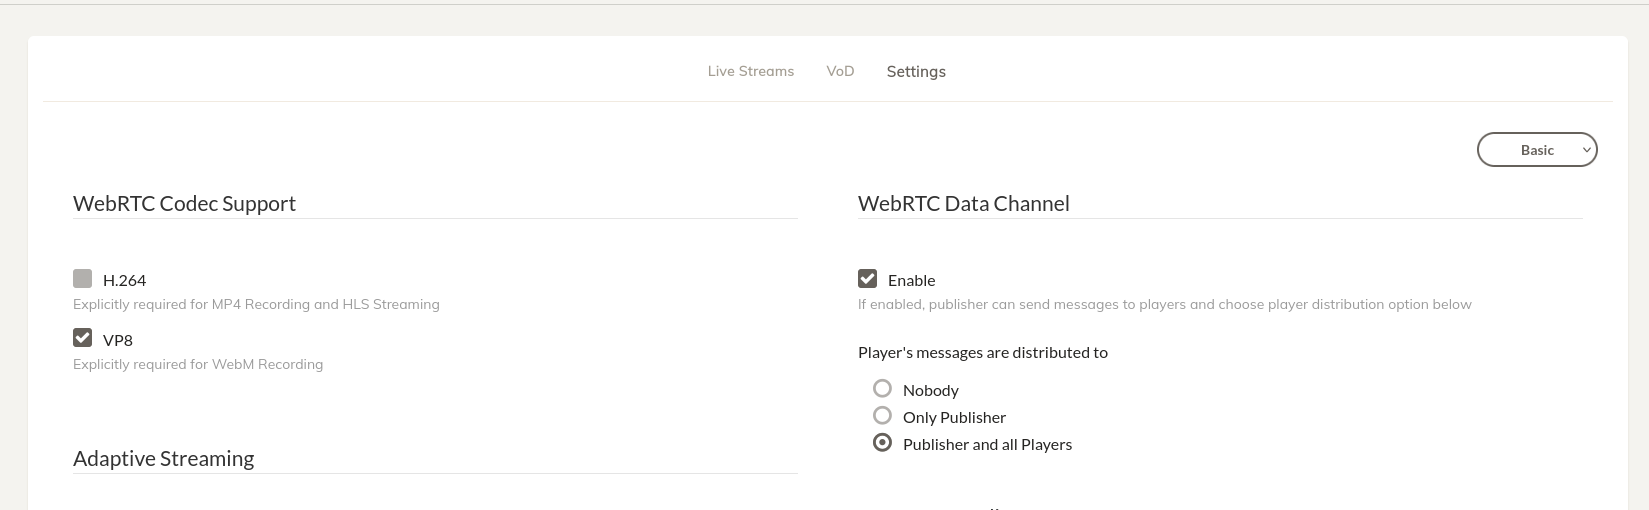
Unity projects can be built for multiple platforms. Currently, VP8 codec is supported (H.264 support will be added later). Ensure your AMS application is configured to use VP8.
Windows Build
-
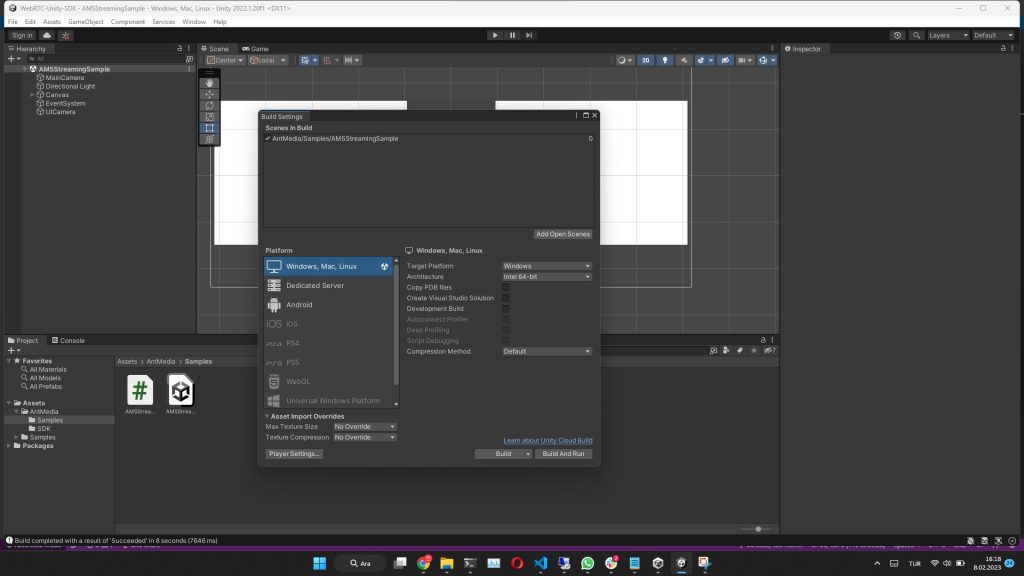
Navigate to File/Build settings
-
Select Windows as the platform
-
Click Build and select the folder that you want to create the executable file
-
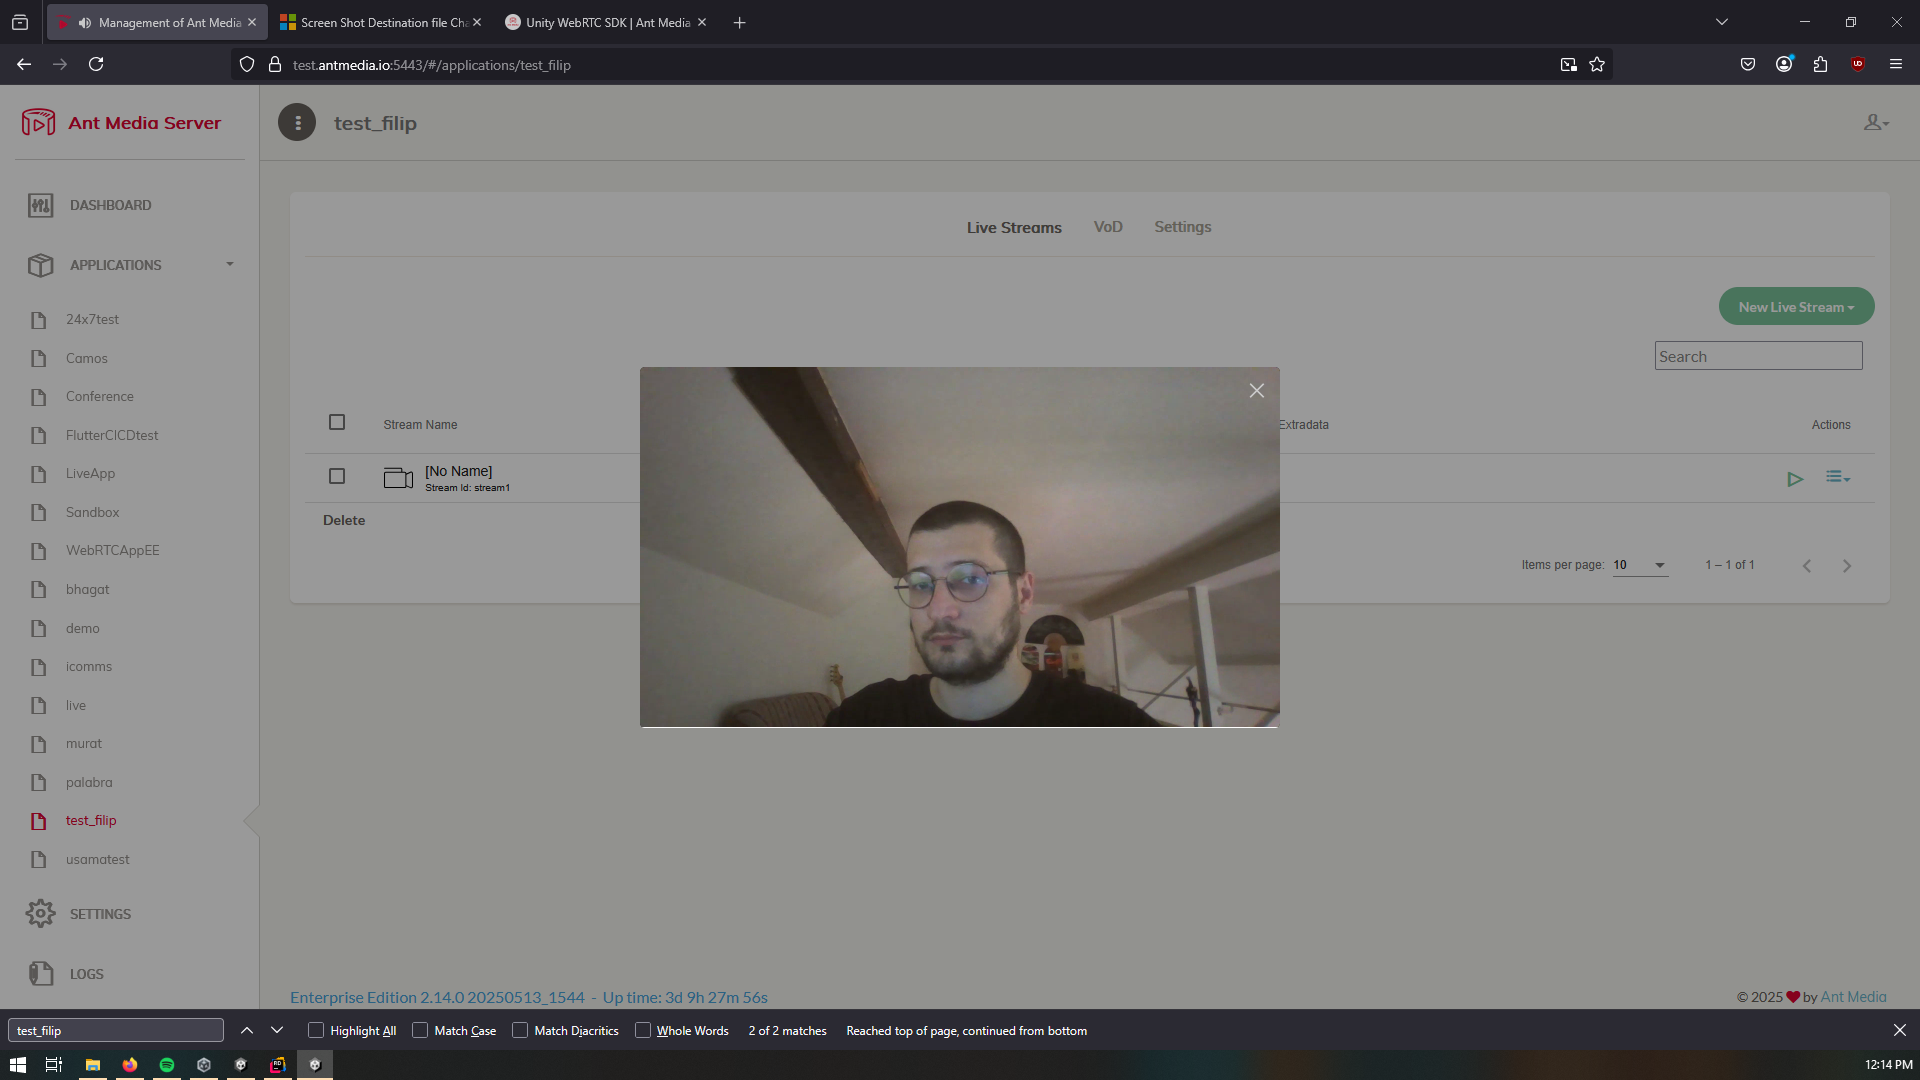
After building we can navigate to the folder we configured in the previous menu and run it, we should see the following:

- We can play it from the dashboard:
Android Build
-
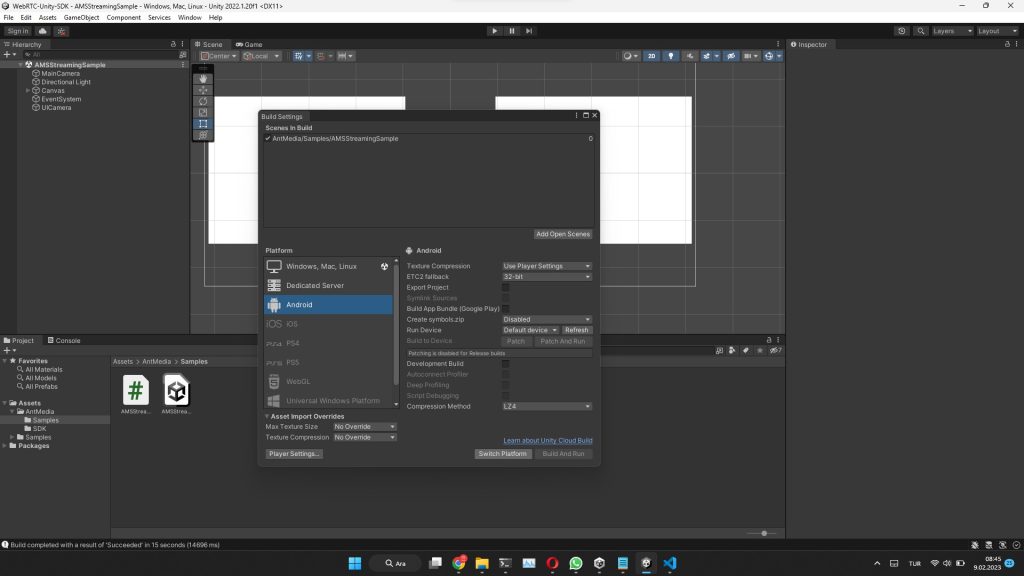
Navigate to File/Build settings
-
Select Android as the platform and click the Switch Platform button
-
The click Player settings
-
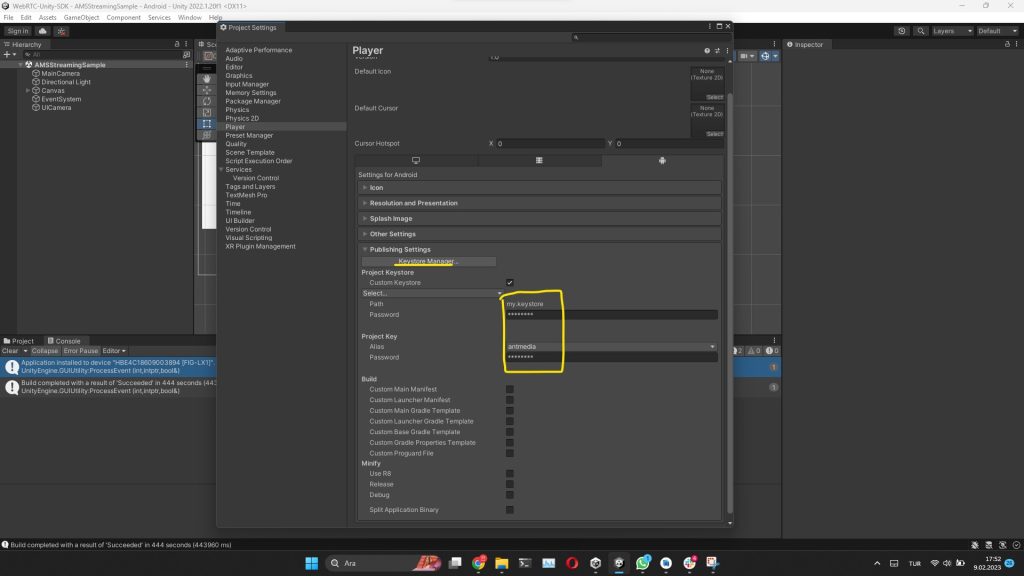
Expand Publisher Settings
-
Create a Keystore via KeyStore Manager
-
Then Select the created keystore as Custom Keystore and set the password that you determine while creating the keystore
-
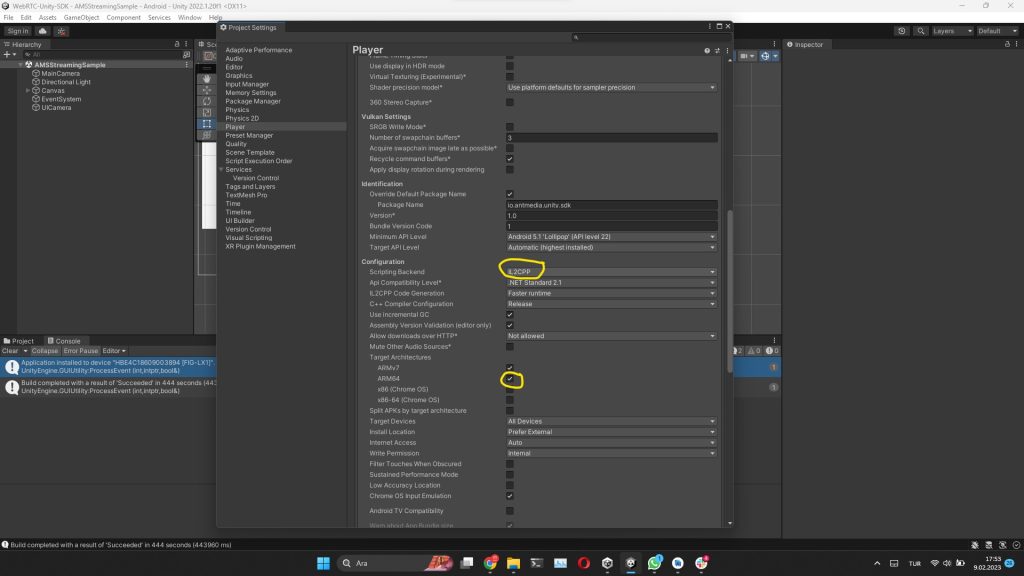
Expand Other Settings
- Set Scripting Backend to IL2CPP
- Check ARM64 checkbox
-
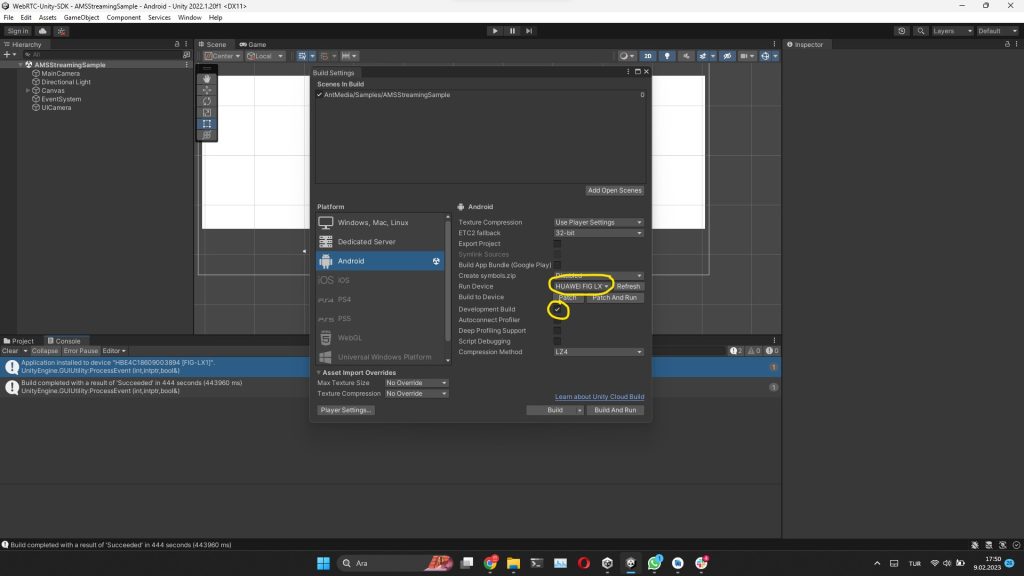
Go back to the Build window
- chose the device you want to install and run the application. Don't select to create the apk file without running it
- check the Development Build
-
Click Build or Build and Run button and select the folder that you want to create the apk file
Run The Project
After running the executable of the Ant Media Unity WebRTC Sample Application you will get the following screen.
Unity WebRTC SDK Sample Application
This Sample Application has 3 modes. You can select the mode you want to test from the Dropdown menu.
Publish Mode
Opens the camera and publishes it as a WebRTC stream to AMS.
You can play the stream at:
https://{AMS_URL}:5443/WebRTCAppEE/play.html?streamId={STREAM_ID_YOU_SET}
Play Mode
In this mode, Sample Application starts to play a stream on the AMS with WebRTC. So you can create a stream (with the stream id that you set in the SDK) on AMS as written here. Then when you click Start Sample Application will play it in the second player.
Peer Mode
In this mode, Sample Application publishes the camera as a WebRTC stream and plays the other peer's WebRTC stream at the same time. After clicking the start button your camera will appear in the first player. Then you can add the second peer from:
https://{AMS_URL}:5443/WebRTCAppEE/peer.html by setting the stream id as you set. Then Sample Application will play the other peer's stream in the second player.
Congratulations!
You have successfully set up the Ant Media Unity WebRTC SDK, built the sample application, and tested publishing, playing, and peer-to-peer WebRTC streams. You can now explore all three modes, interact with other peers, and integrate WebRTC streaming into your own Unity projects. Enjoy real-time streaming and communication in your Unity applications!