Scale AMS with AWS CloudFormation
Now let's start on the CloudFormation setup and continue step by step.
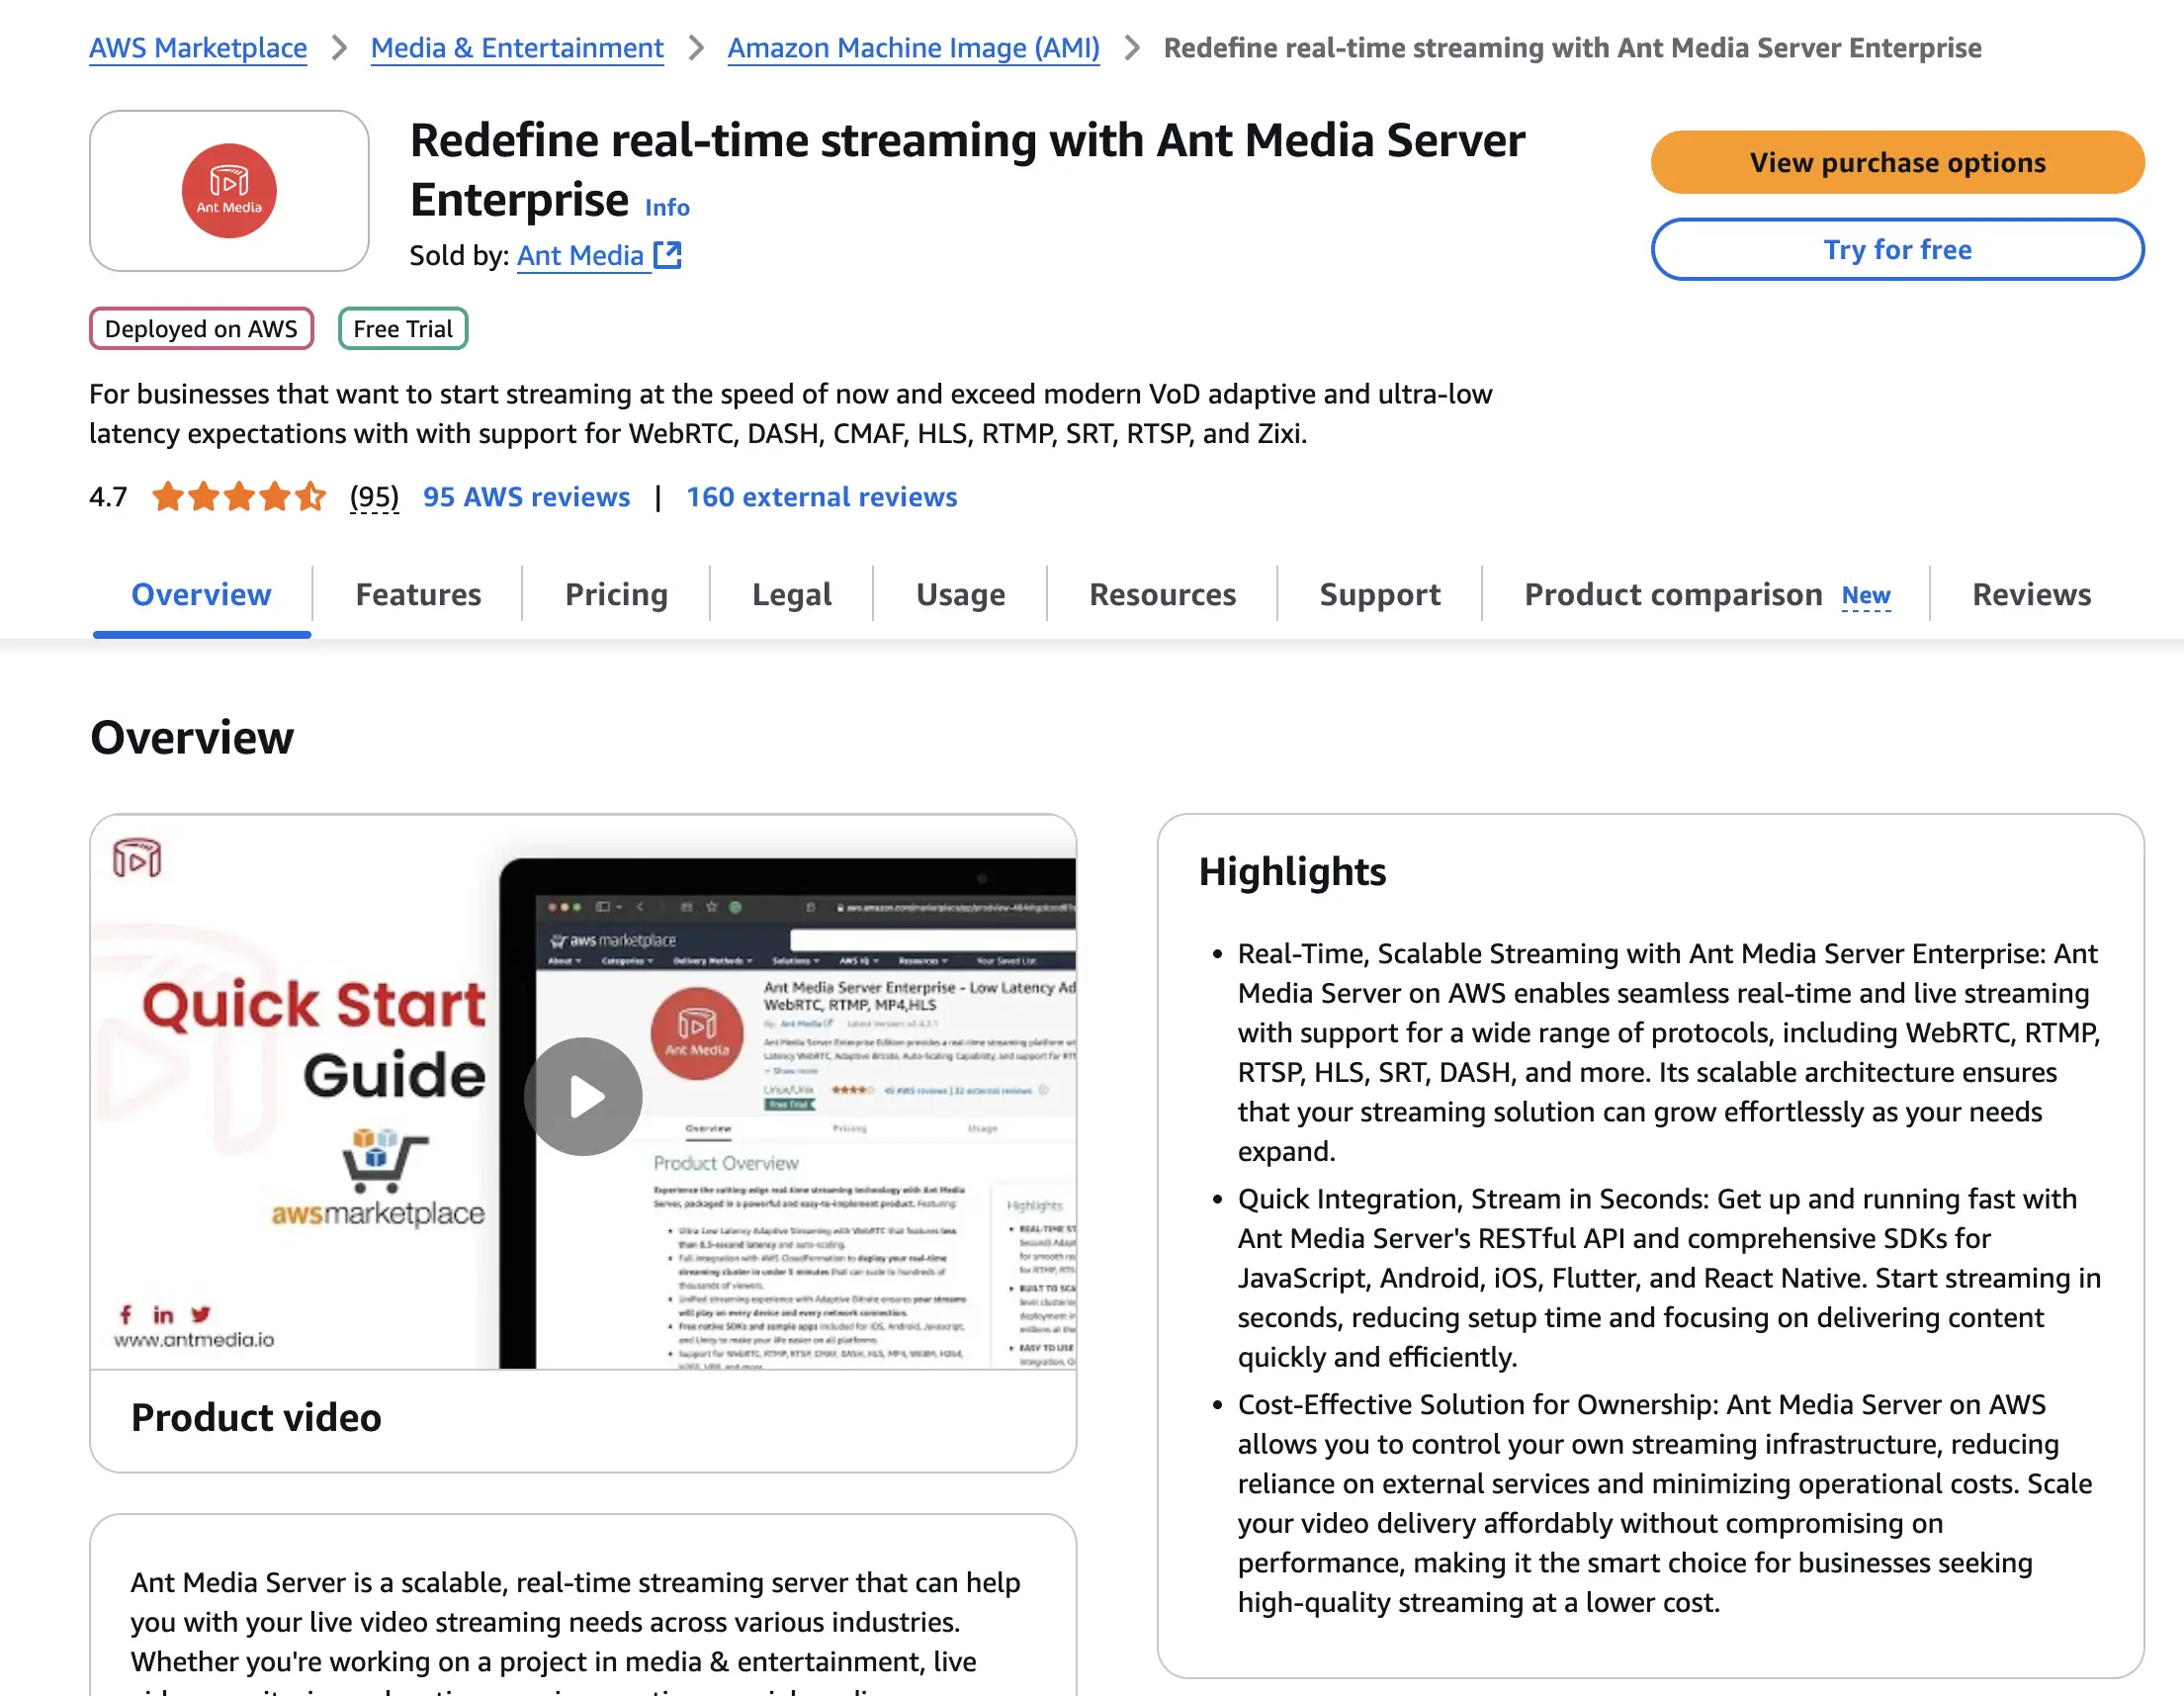
1. Firstly, let's subscribe to the Ant Media Server on the Amazon Marketplace.
Open the link: https://aws.amazon.com/marketplace/pp/B07569Y9SJ/ then please proceed by clicking “View Purchase Options” button.
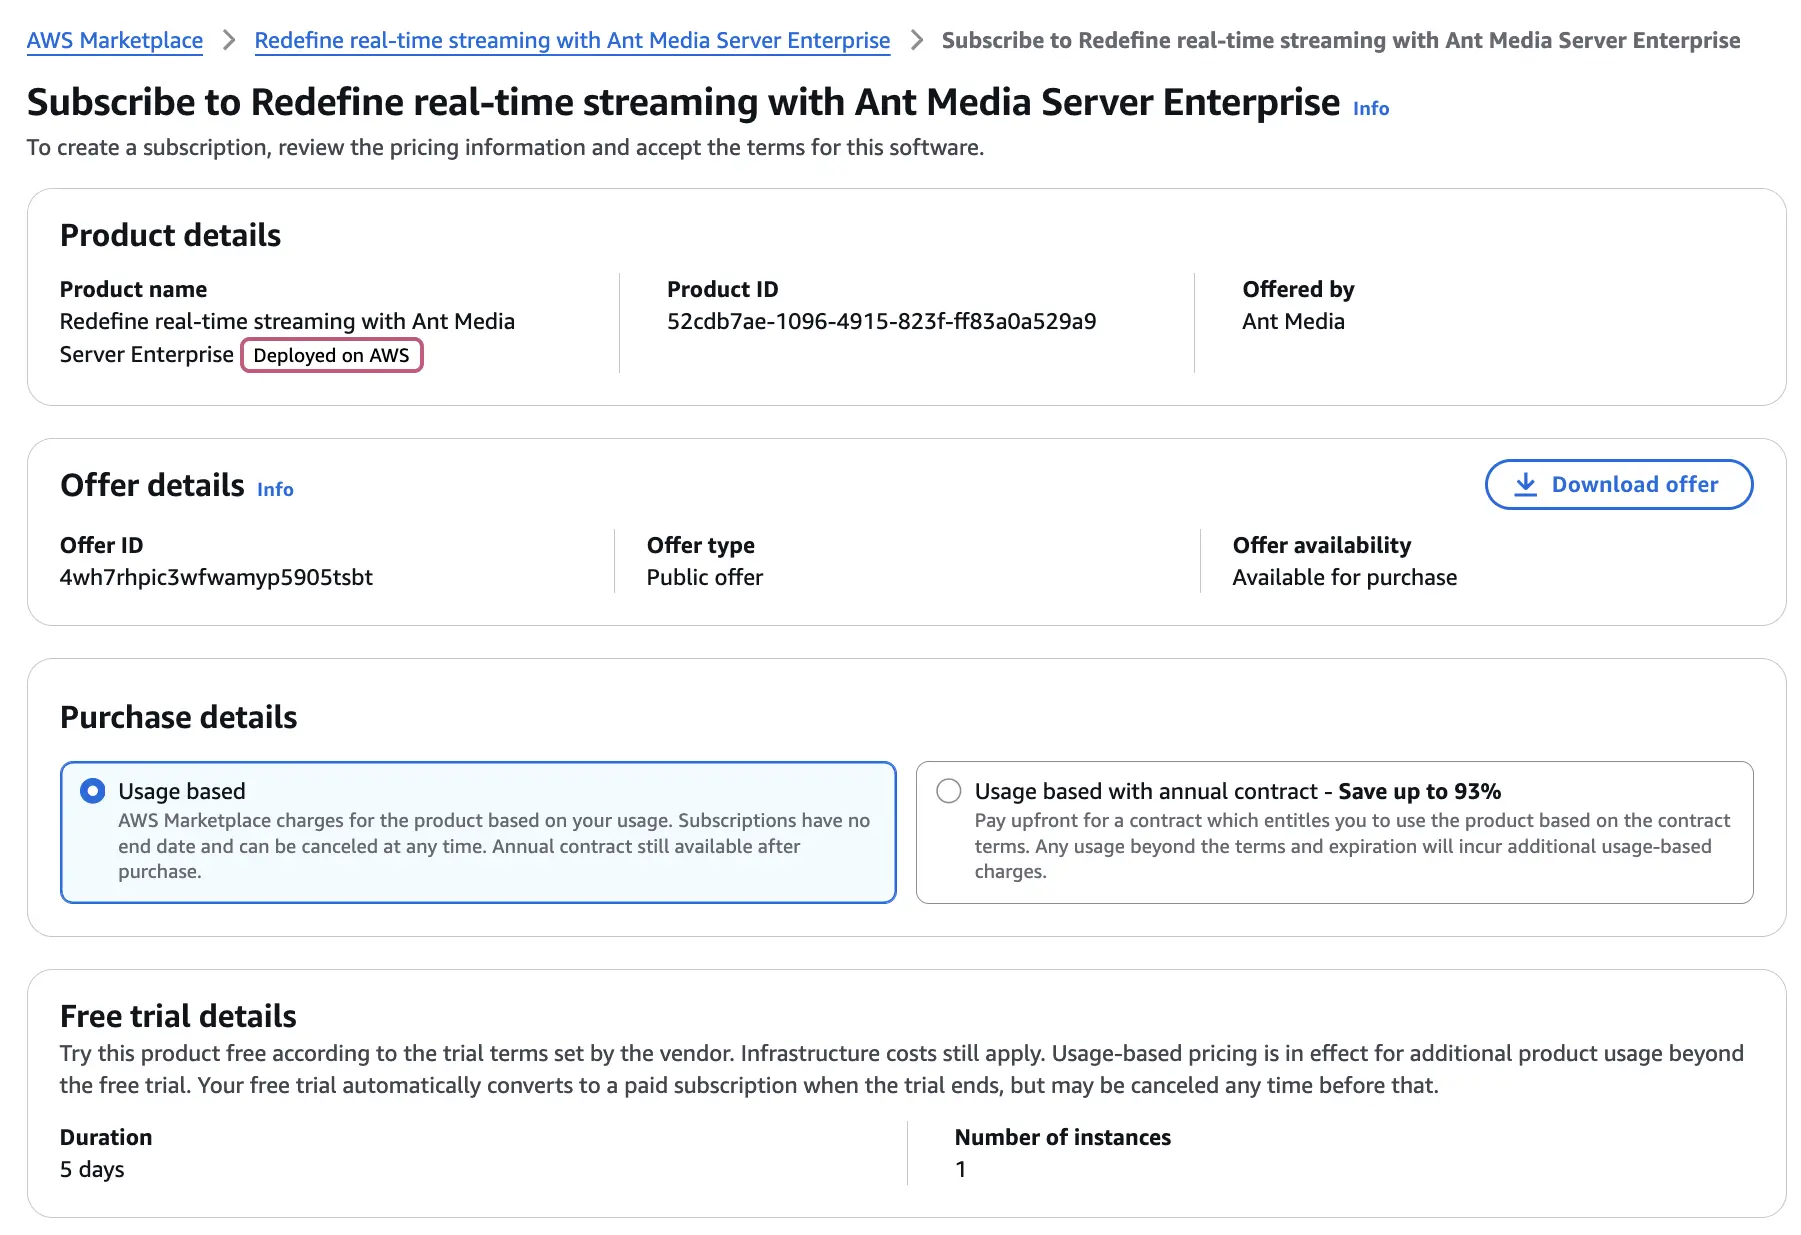
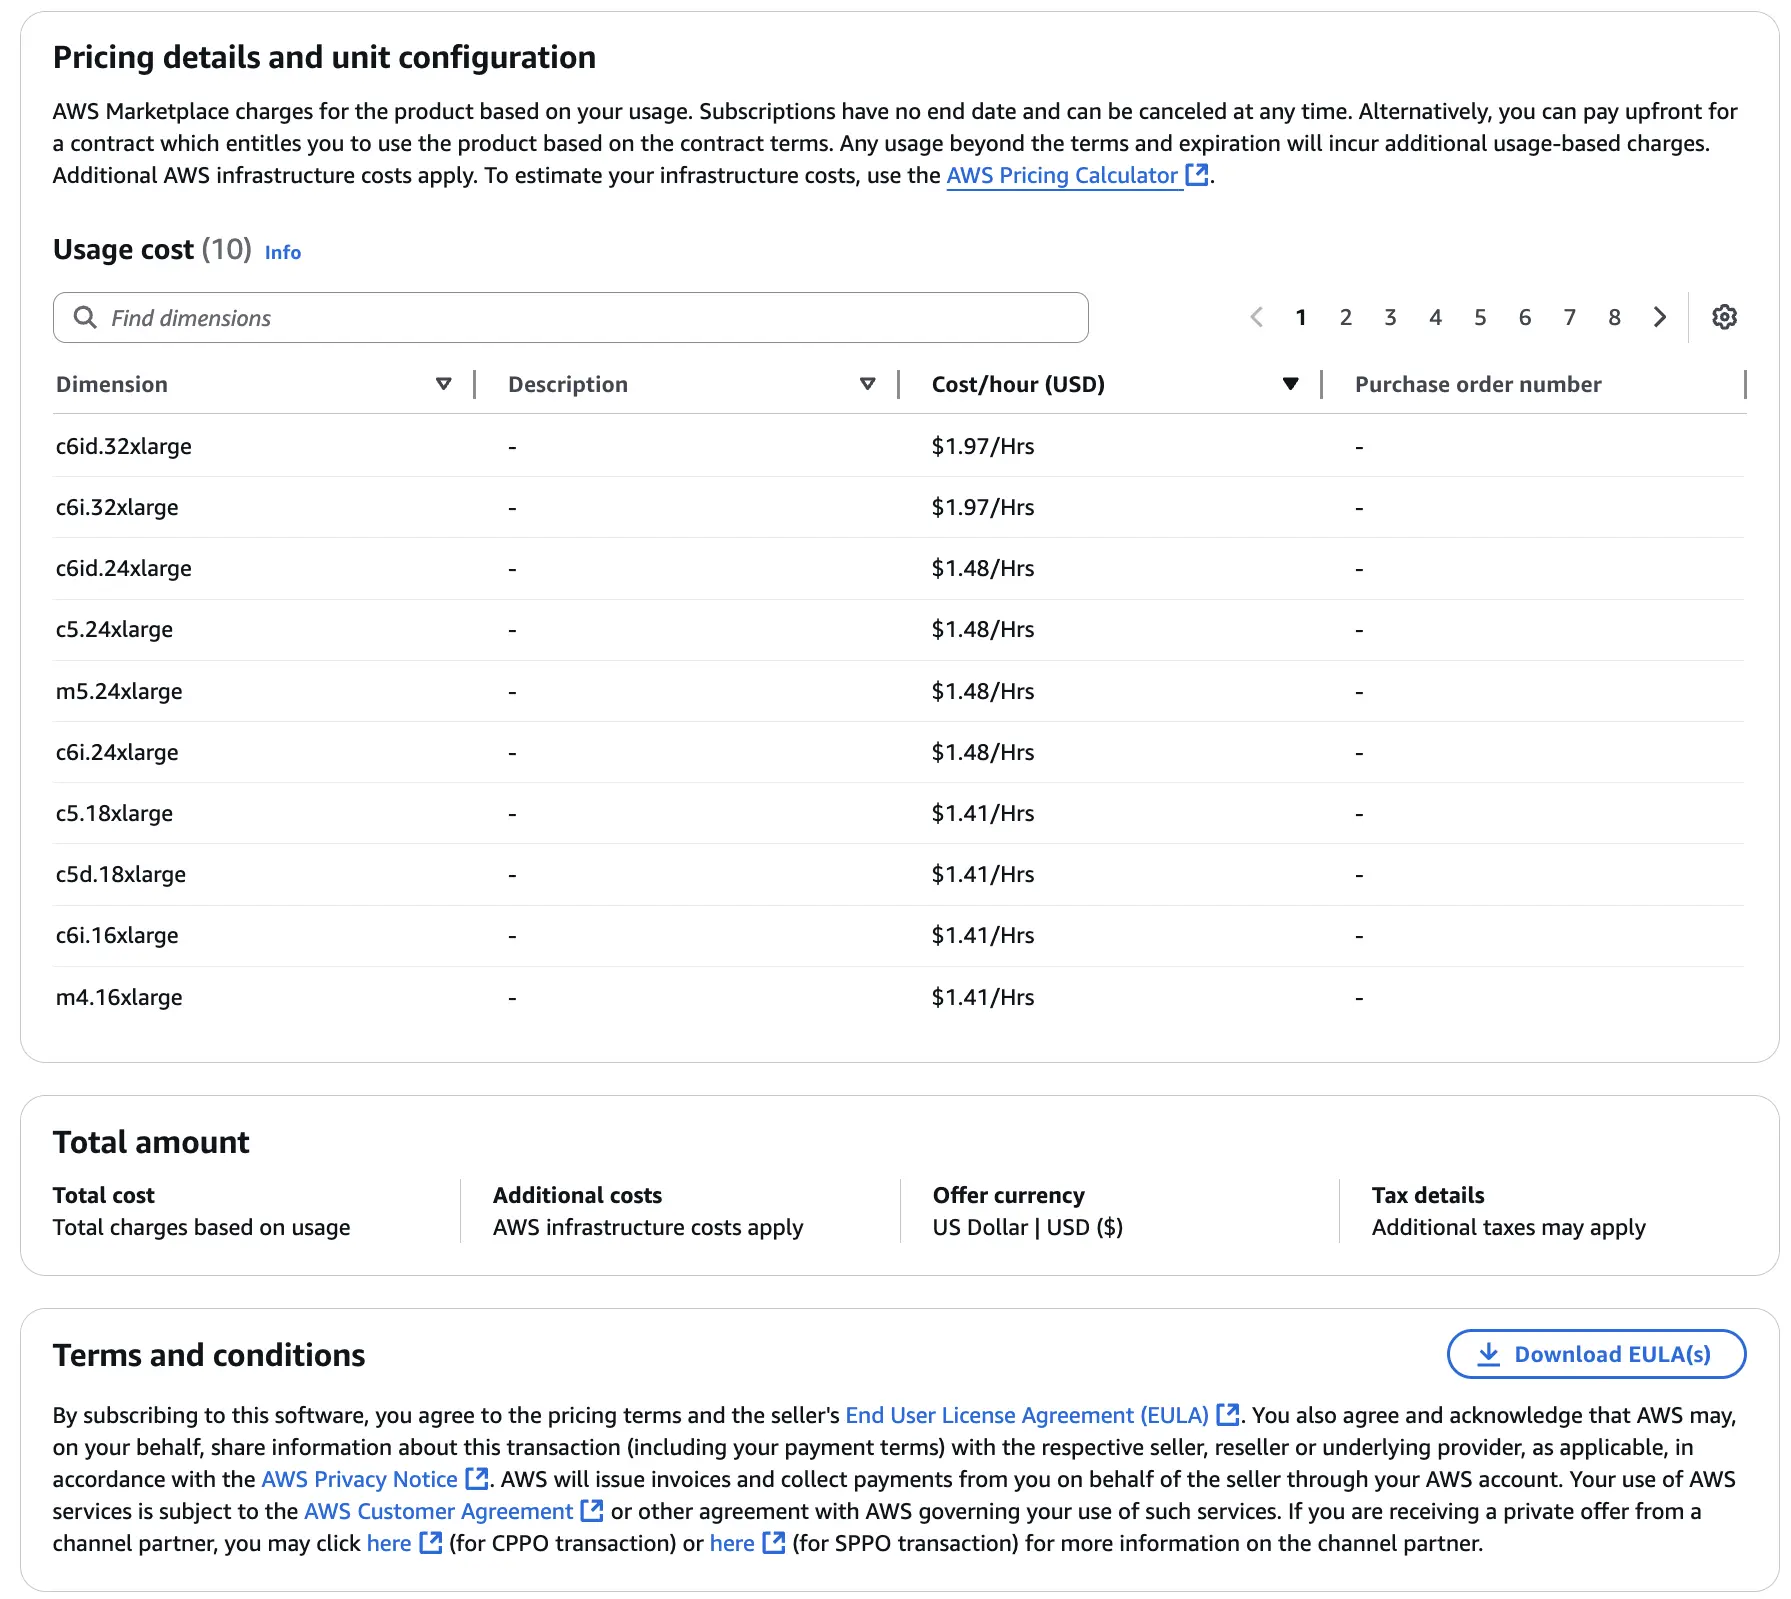
2. Now review the settings as shown in below screenshots and Please proceed by clicking “Subscribe” button
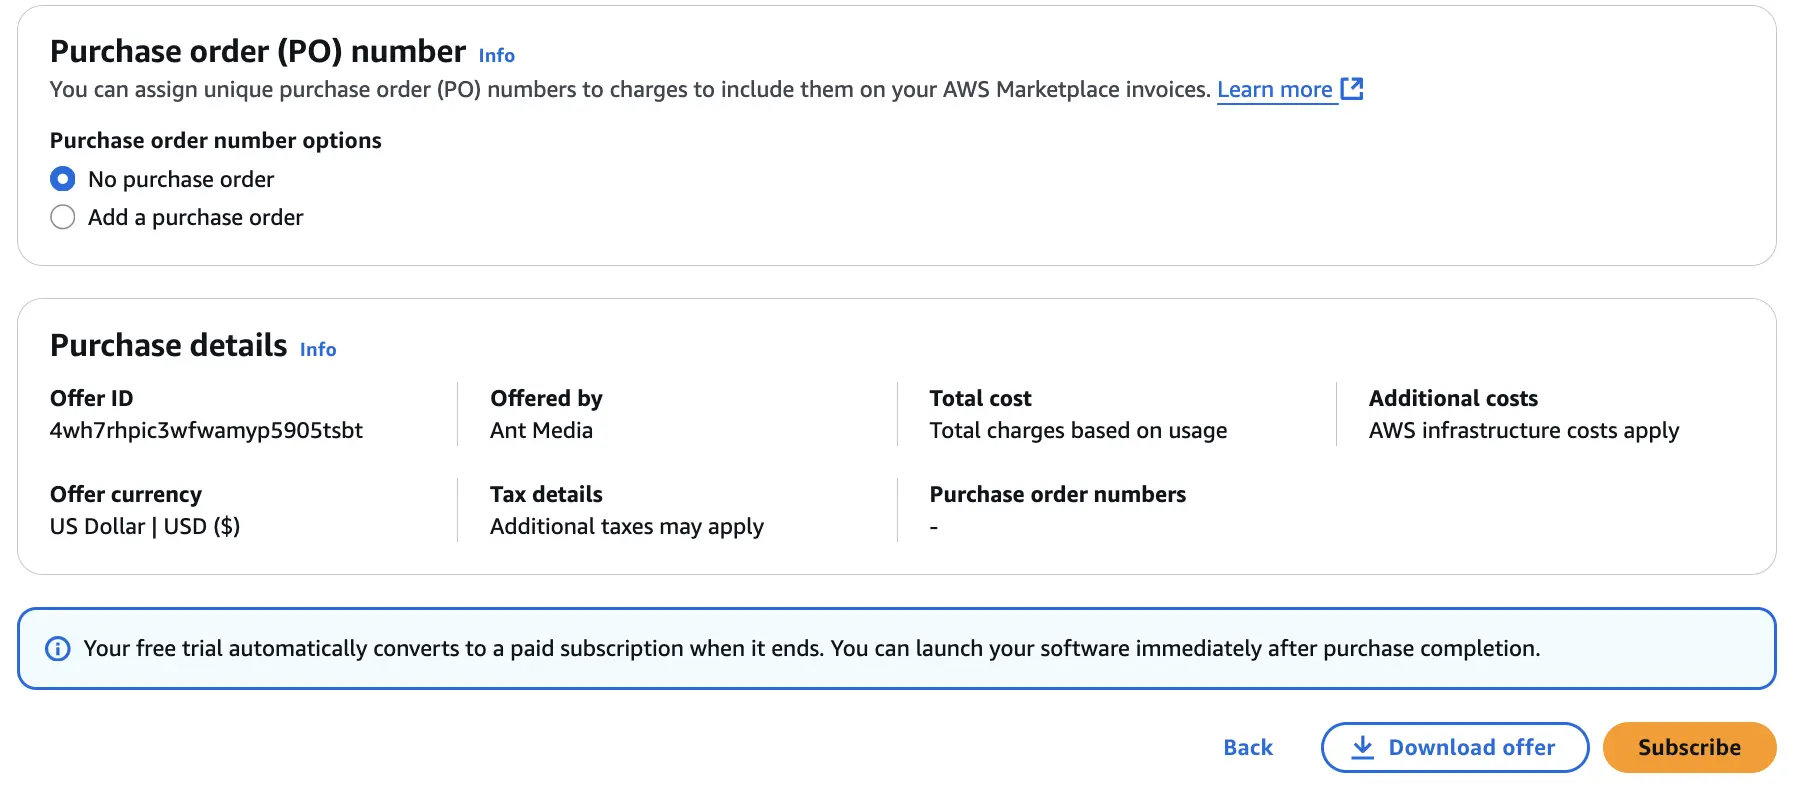
3. If everything goes well, you will see the screenshot below.

4. Now, download the CloudFormation template from the below link to your computer.
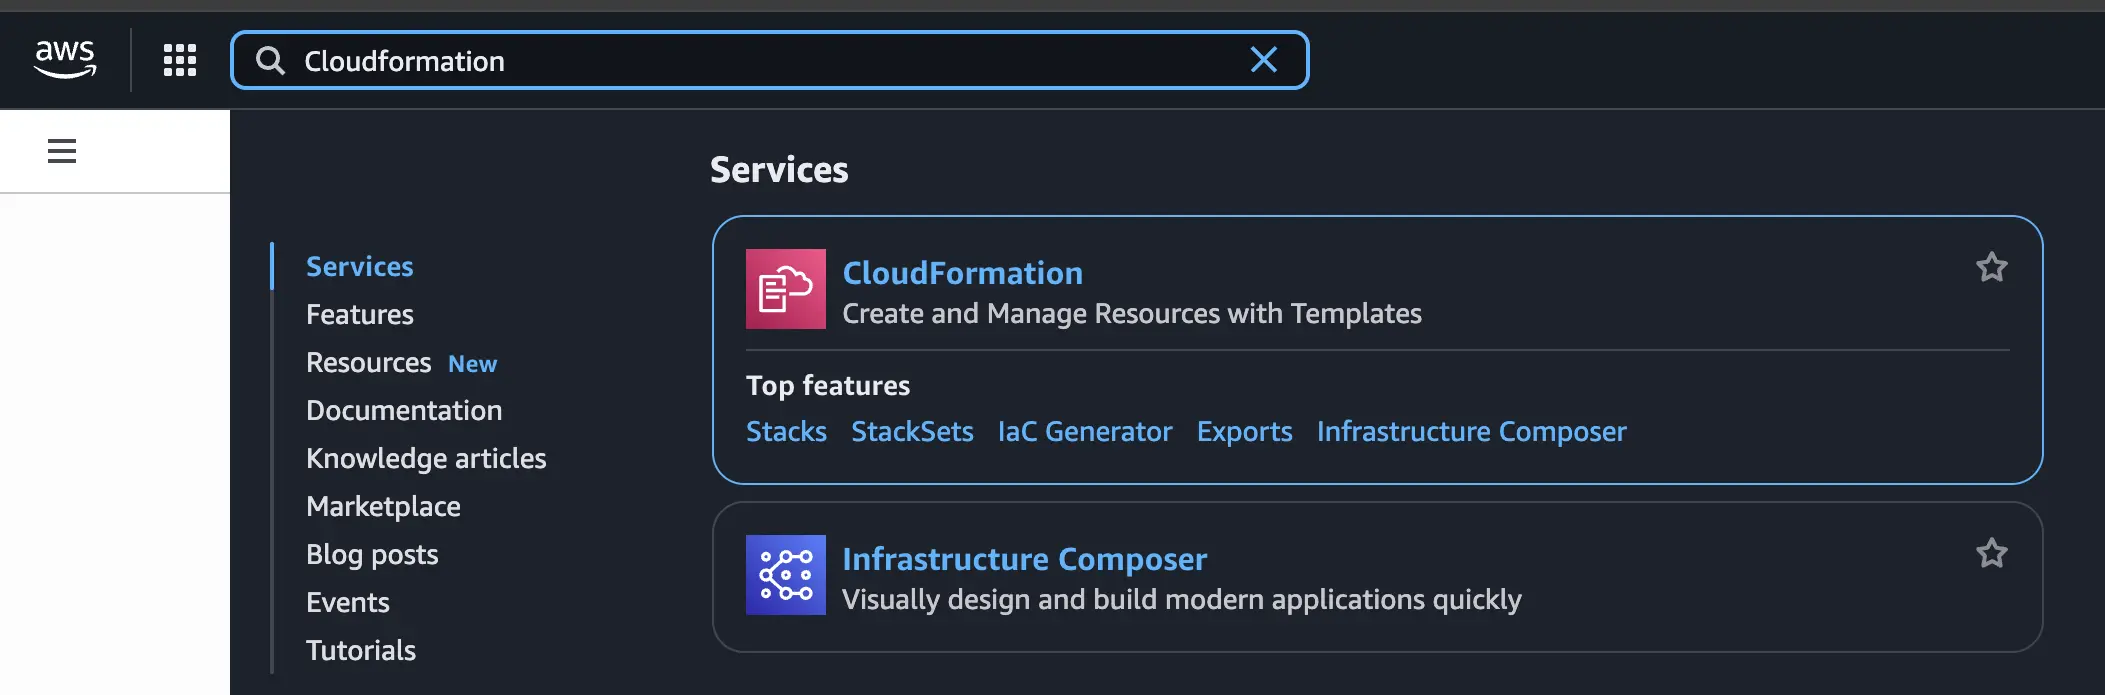
5. Log in to the AWS Dashboard and find CloudFormation in the search box.
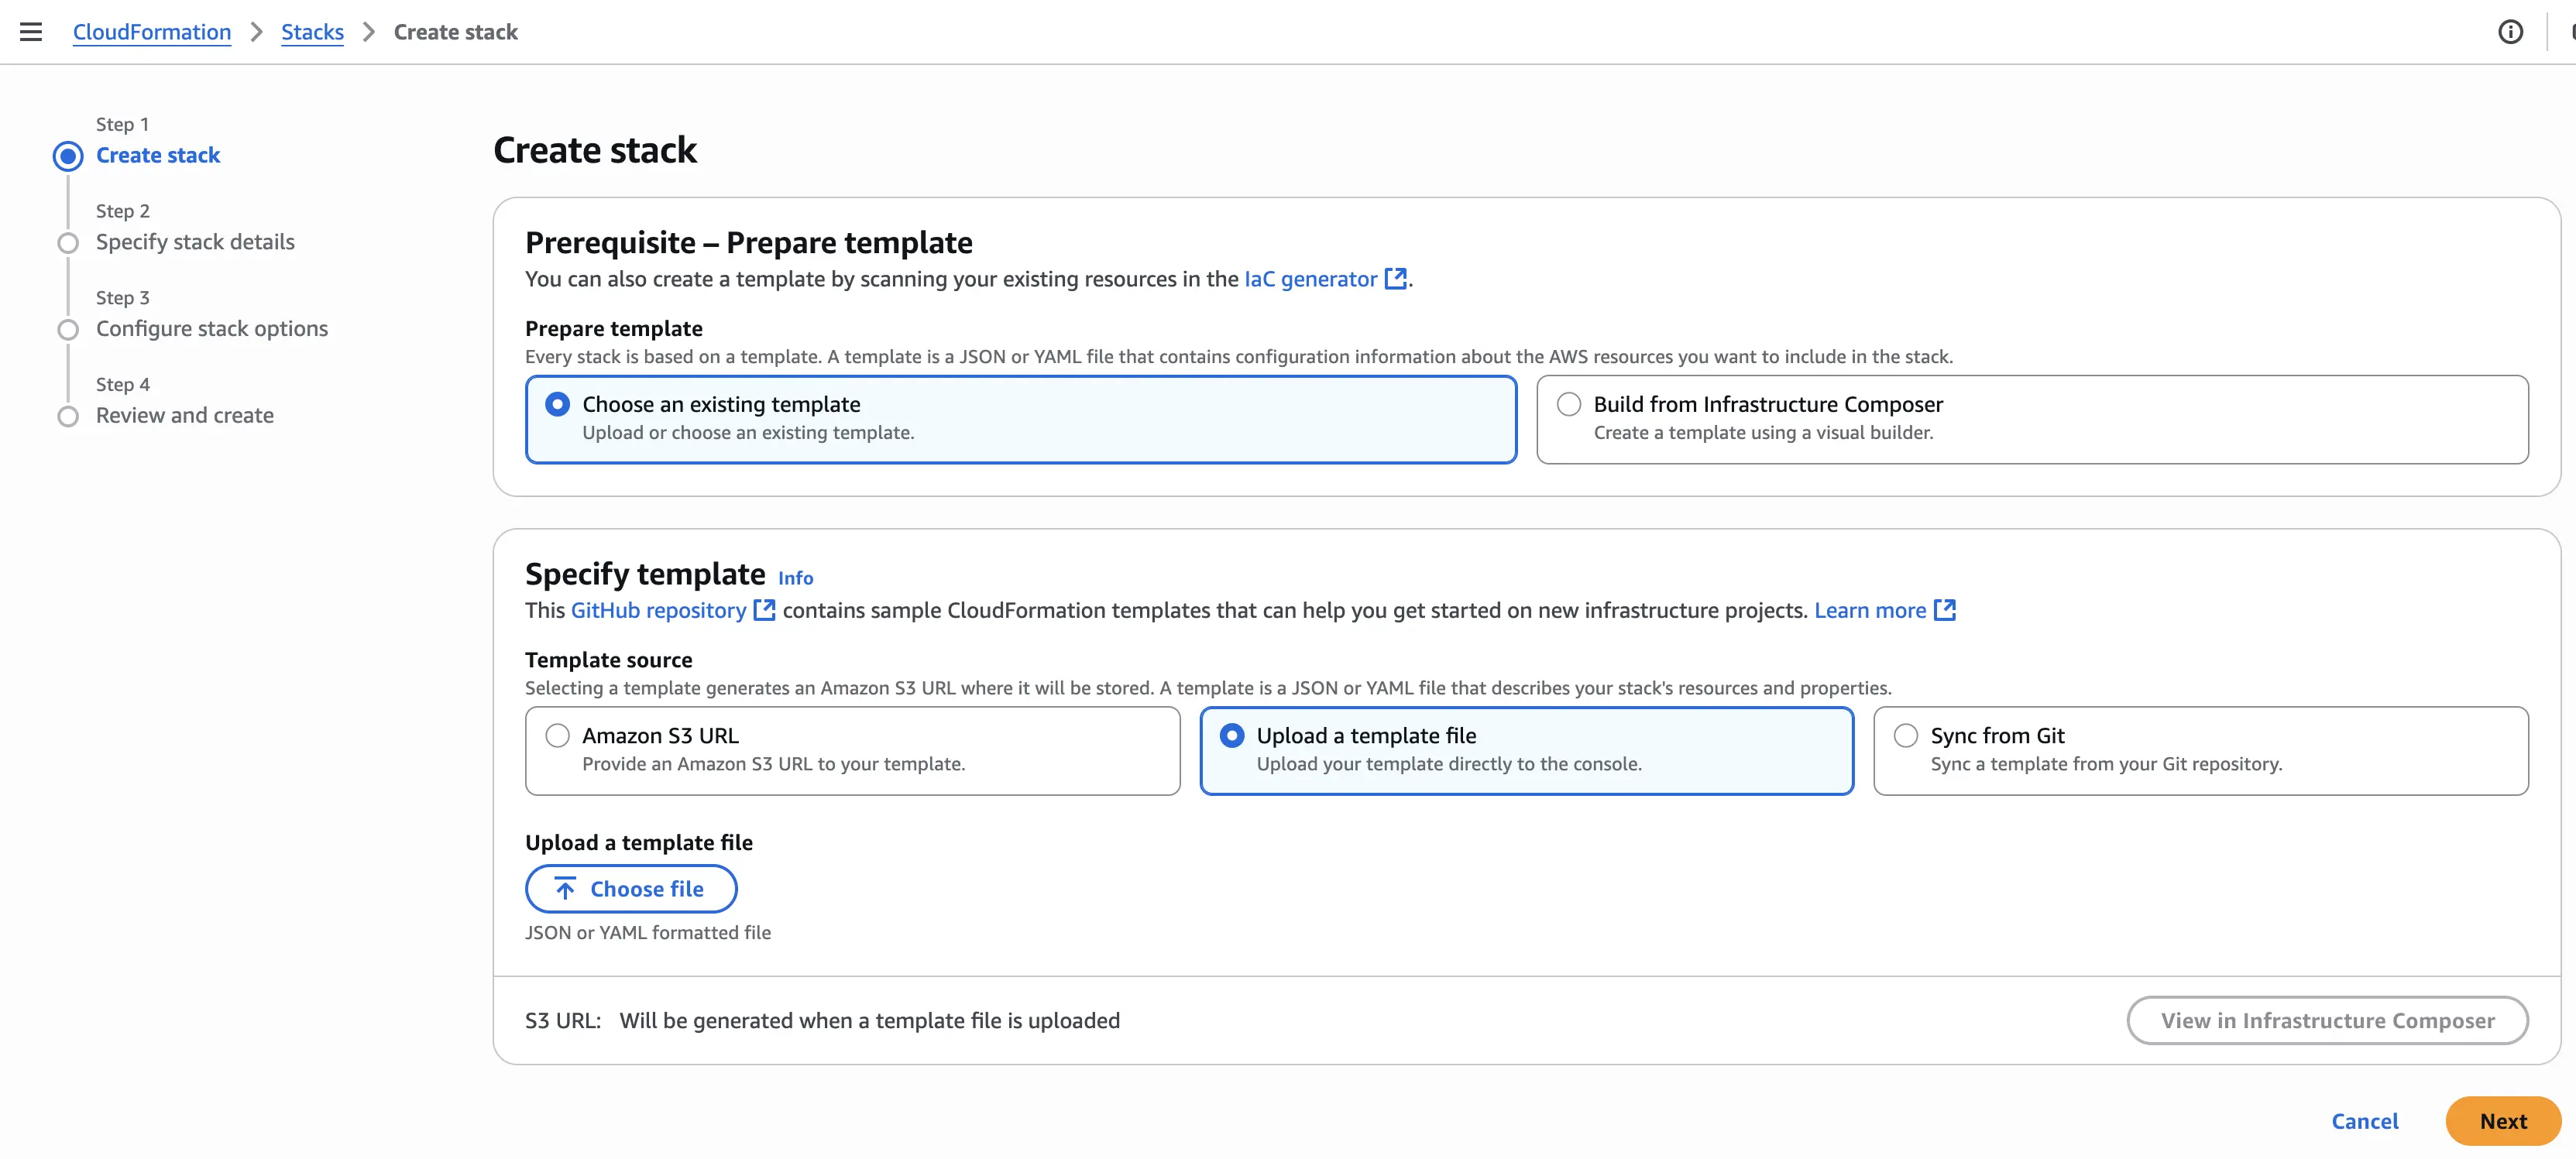
6. Click on Create Stack > With New Resources from the menu.
7. Select Choose an Existing Template > Upload a Template File and upload the downloaded YAML file. Click on "Next",
8. The Specify Stack Details page is where we will adjust all our settings.
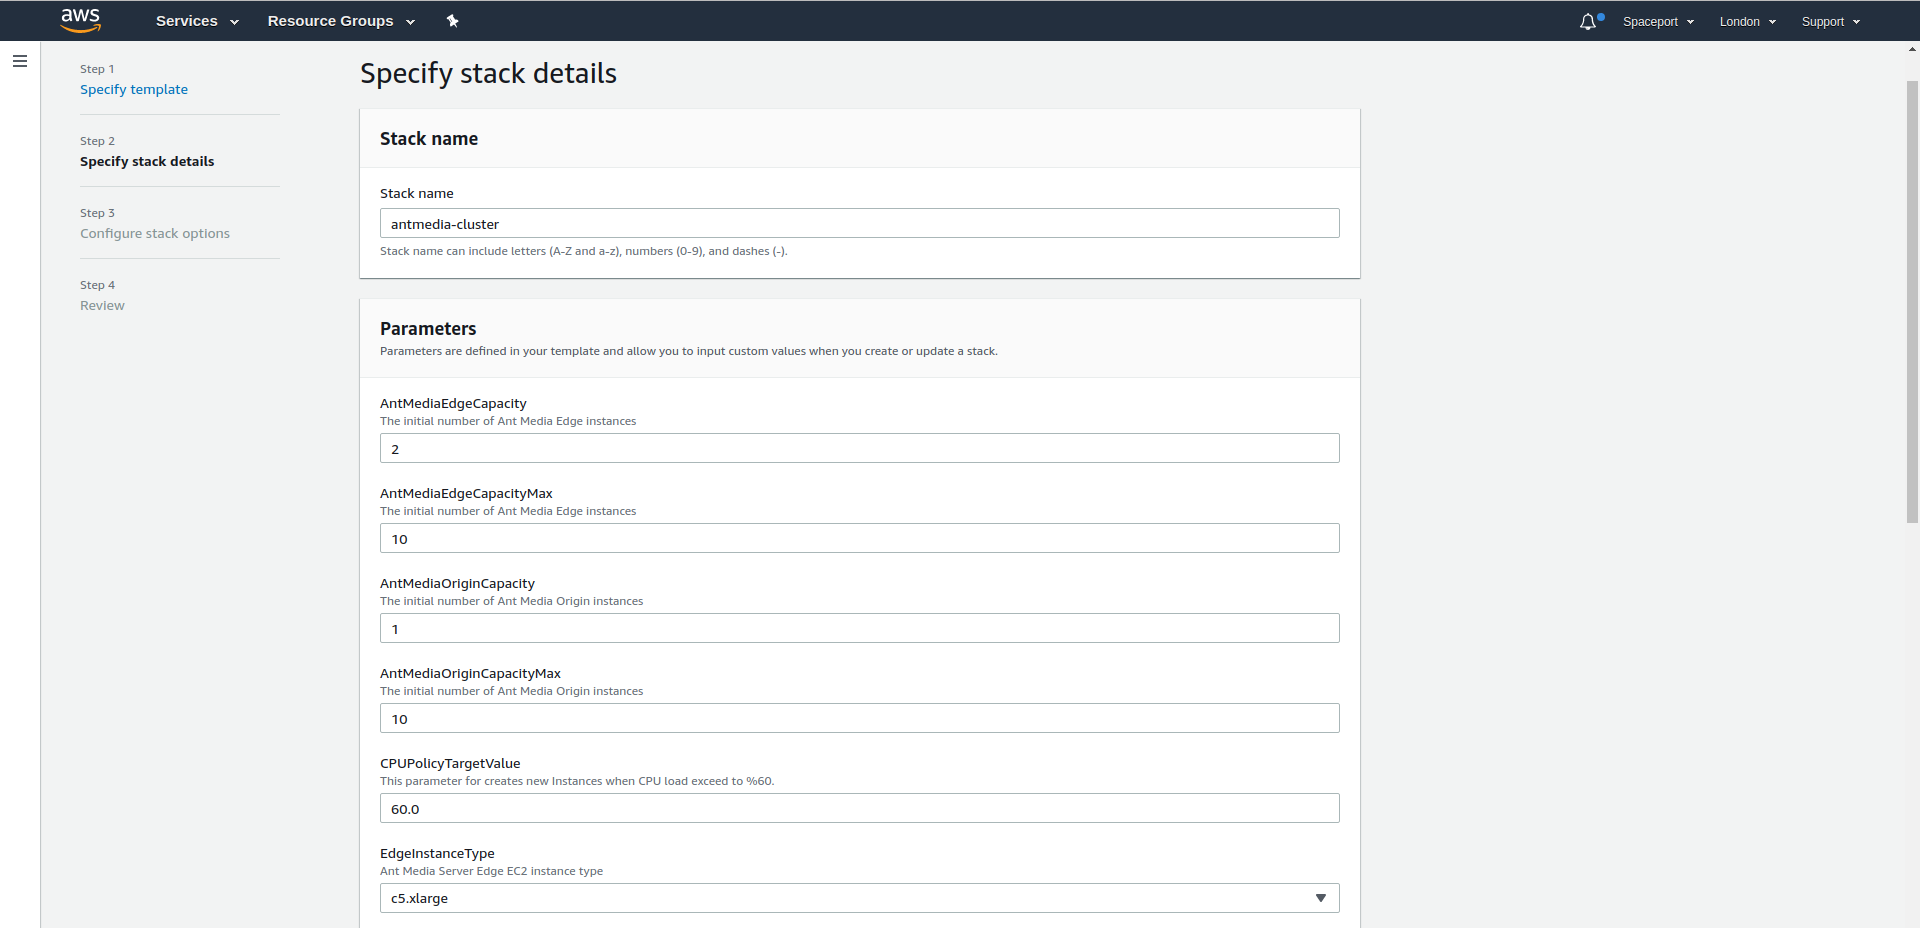
- Stack Name: it will describe your stacks, it will be like a skeleton
- AntMediaEdgeCapacity: How many Edge servers will be created.
- AntMediaEdgeCapacityMax: Edge Server where Auto Scale will reach maximum
- AntMediaOriginCapacity: How many Origin servers will be created.
- AntMediaOriginCapacityMax: Origin Server where Auto Scale will reach maximum
- CPUPolicyTargetValue: Average CPU utilization of the Auto Scaling group. When the server reaches %60 CPU utilization average, new servers will be added
- EdgeInstanceType: Edge Instance Type
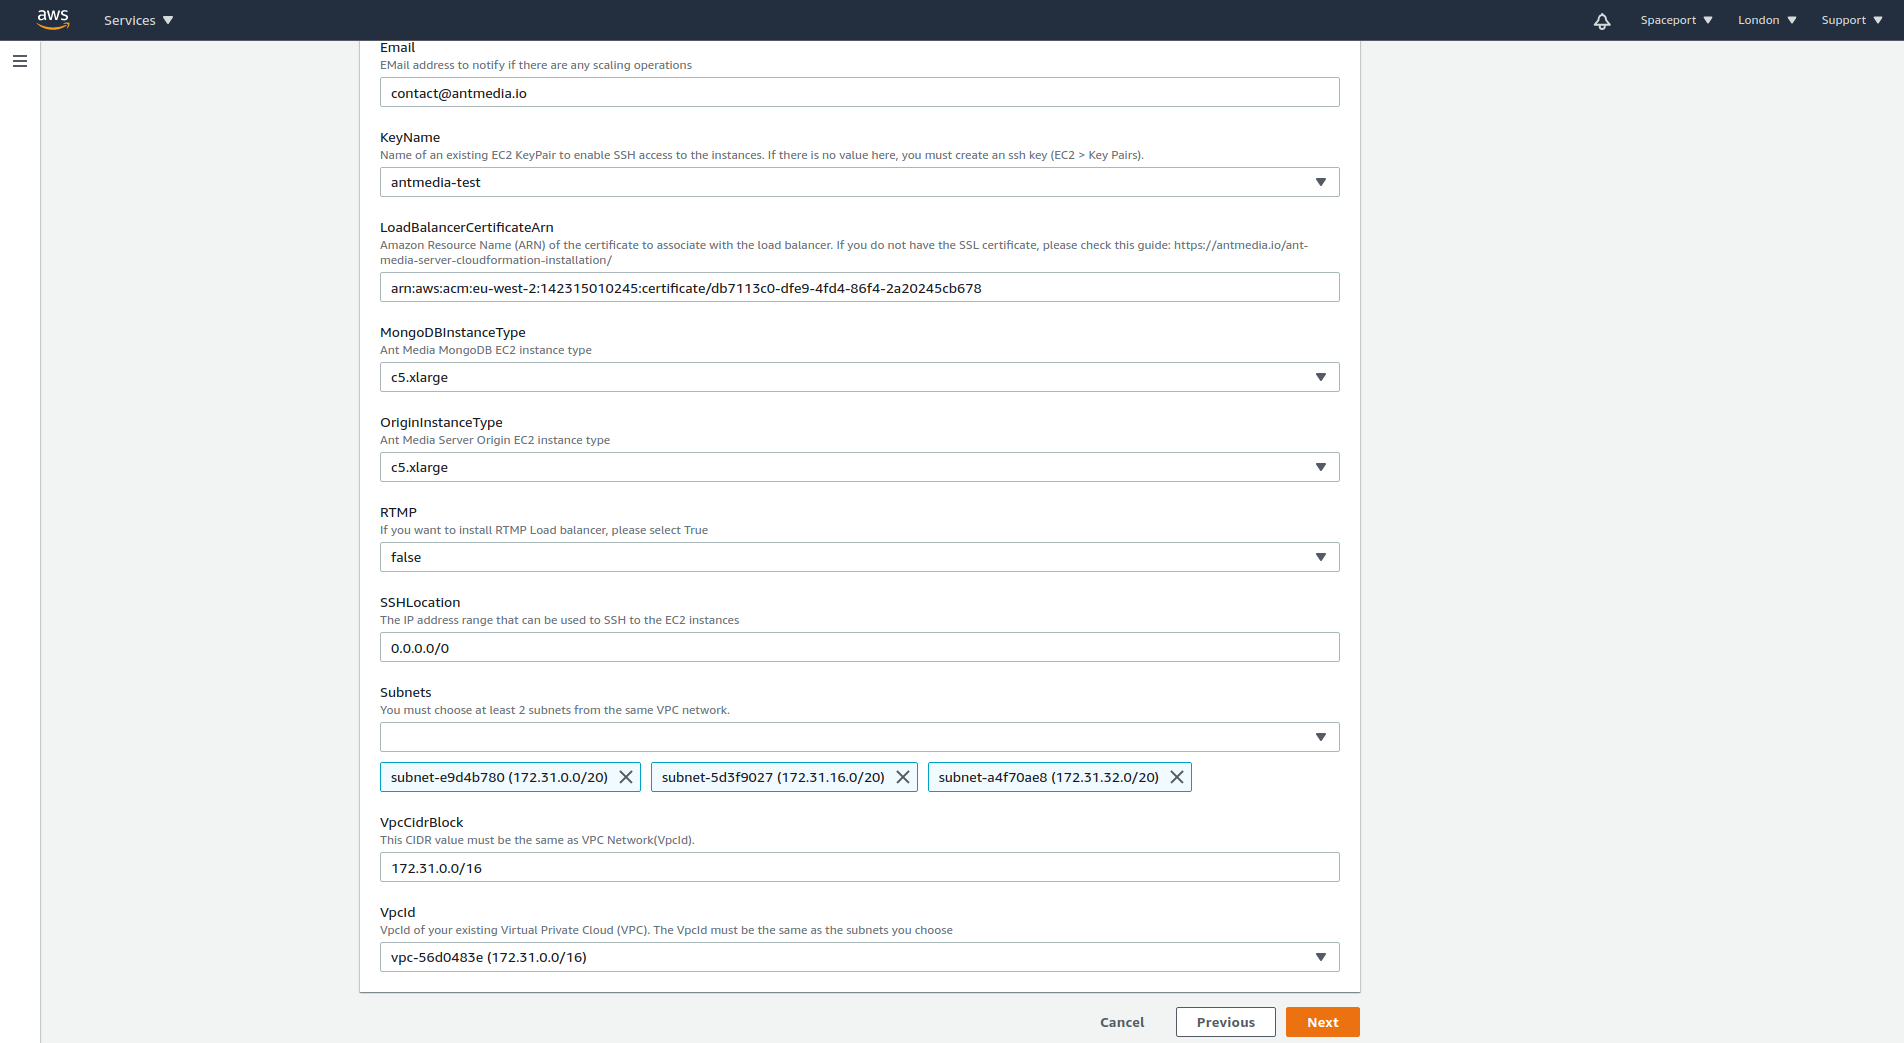
- Email: Subscription Email
- GPUImage: By default it is false. Select "true" to use GPU Image for Origin Group if heavy transcoding is required. You must select one of the g and p instance types.
- KeyName: An Amazon EC2 key pair name.If there is no value here, you must create an ssh key (EC2 > Key Pairs).
- LoadBalancerCertificateArn: Amazon Resource Name (ARN) of the certificate to associate with the load balancer. Please check this guide: https://antmedia.io/ssl-from-aws-certificate-manager-for-domain-name/
- MongoDBInstanceType: MongoDB Instance Type
- OriginInstanceType: Origin Server Instance Type
- SSHLocation: The IP address range that can be used to SSH to the EC2 instances
- Subnets: The list of SubnetIDs in your Virtual Private Cloud (VPC). You must choose at least 2 subnets from the same VPC network.
- VpcCidrBlock: Associates a CIDR block with your VPC. It should be the same as the VPC network.
- VpcId: VpcId of your existing Virtual Private Cloud (VPC). The VpcId must be the same as the subnets you choose.
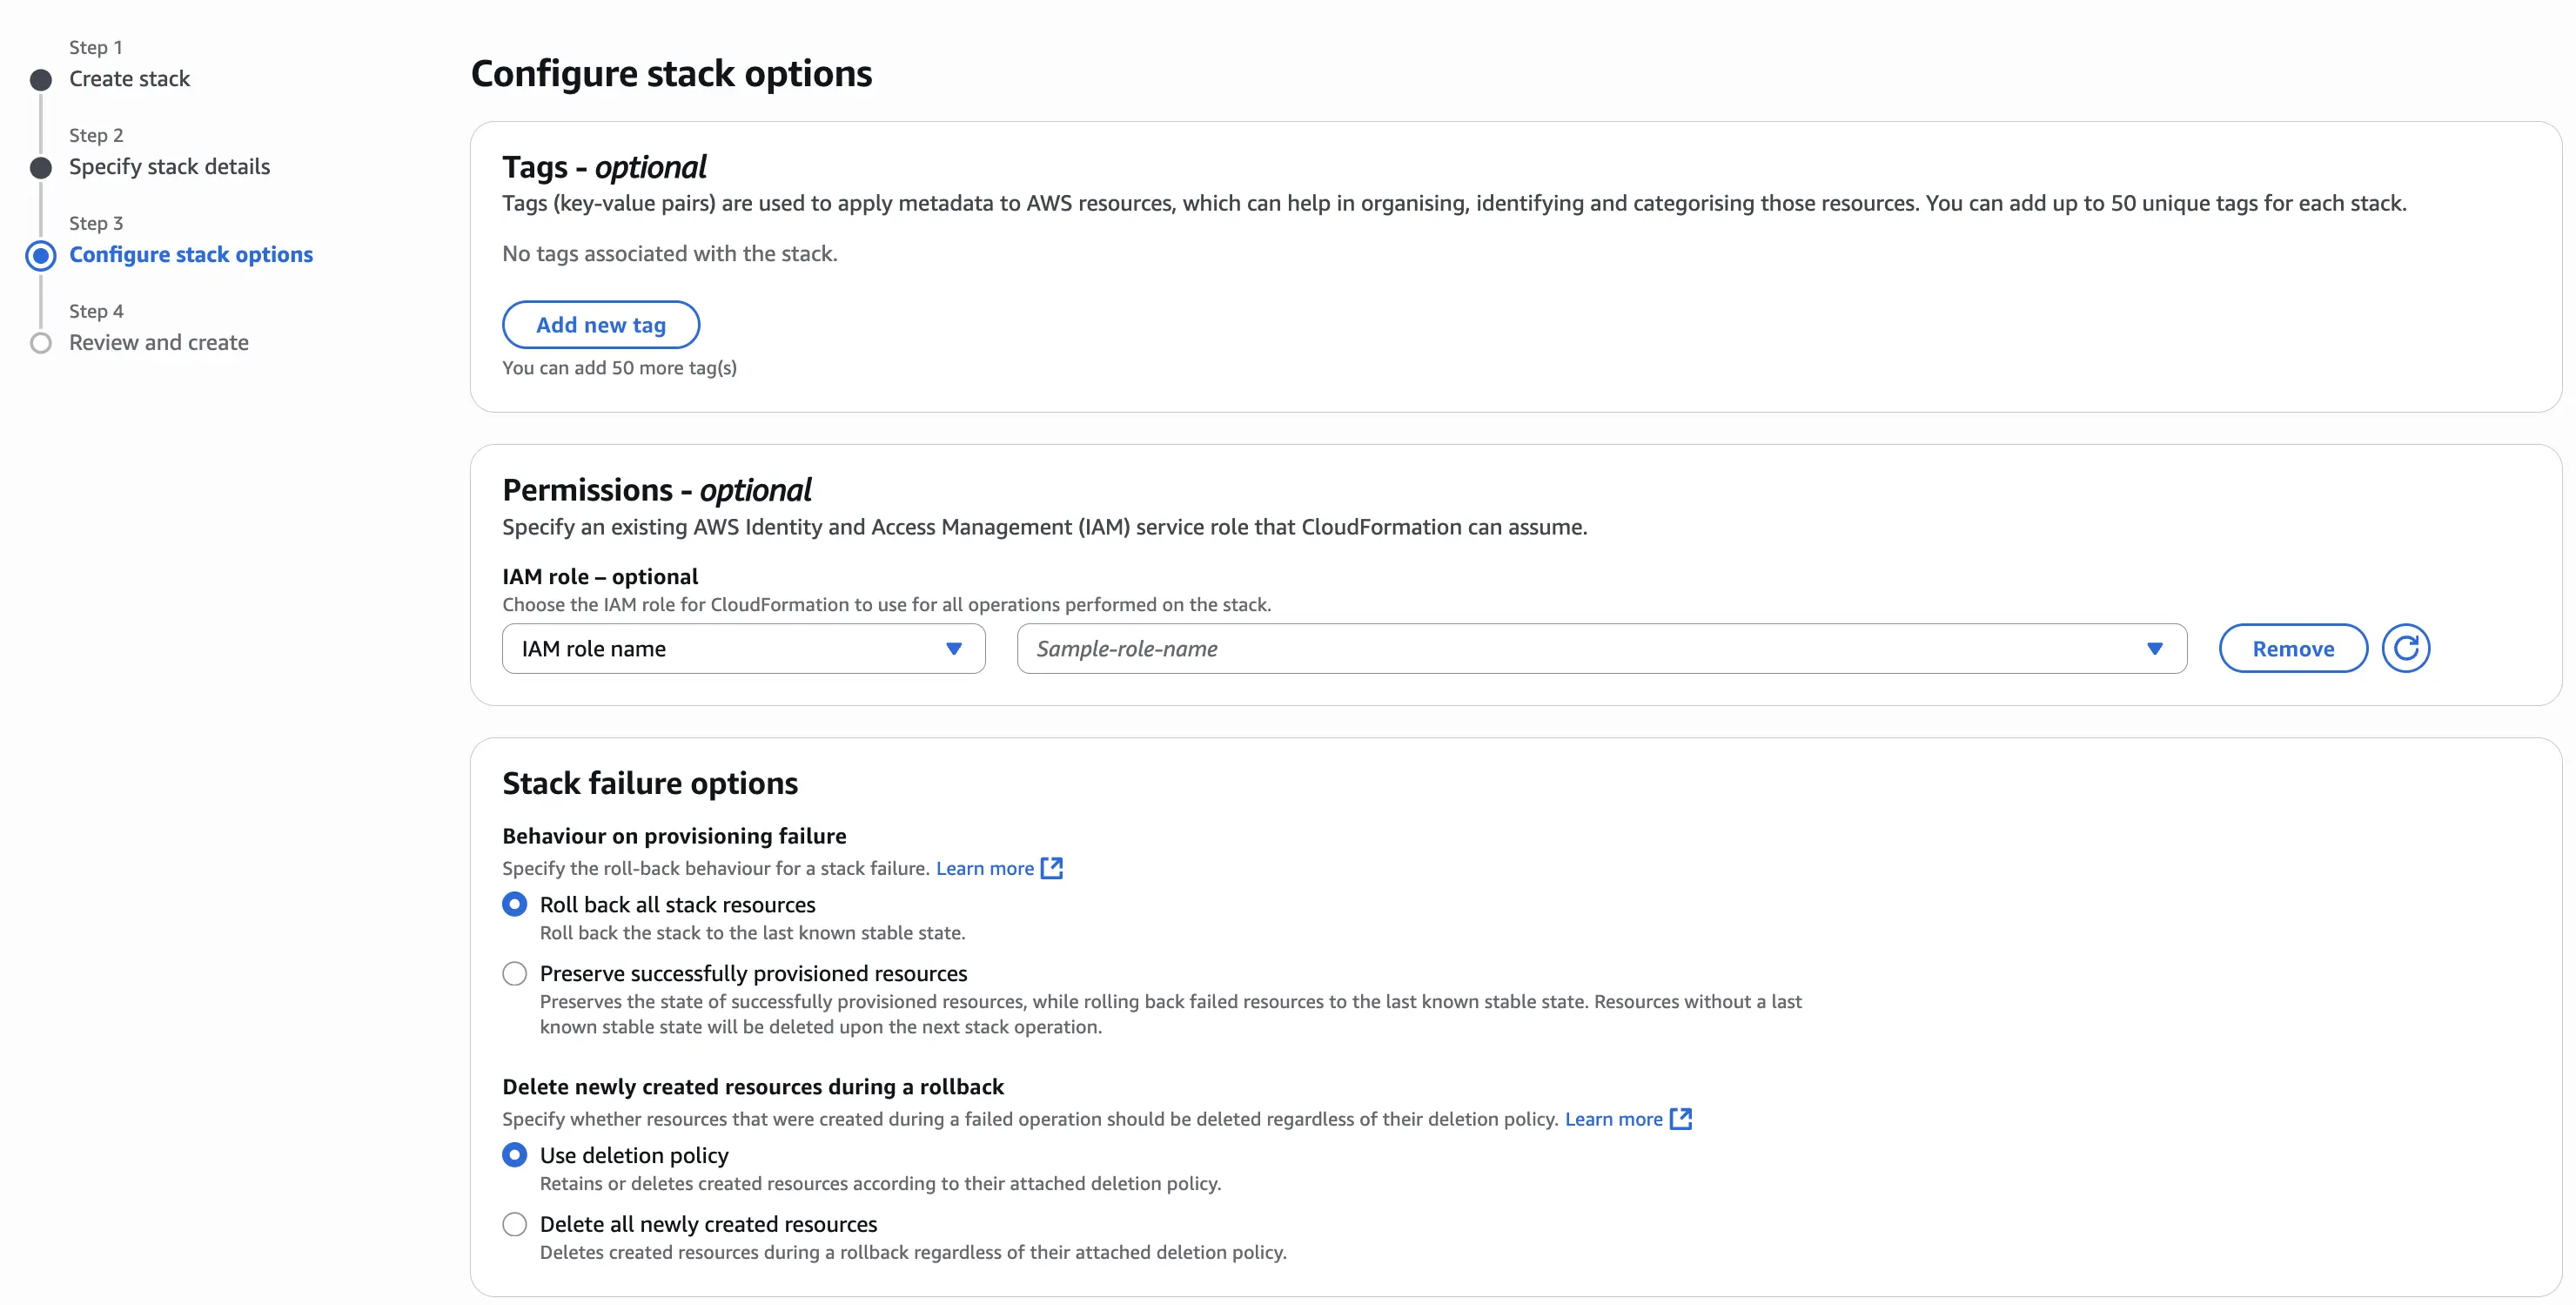
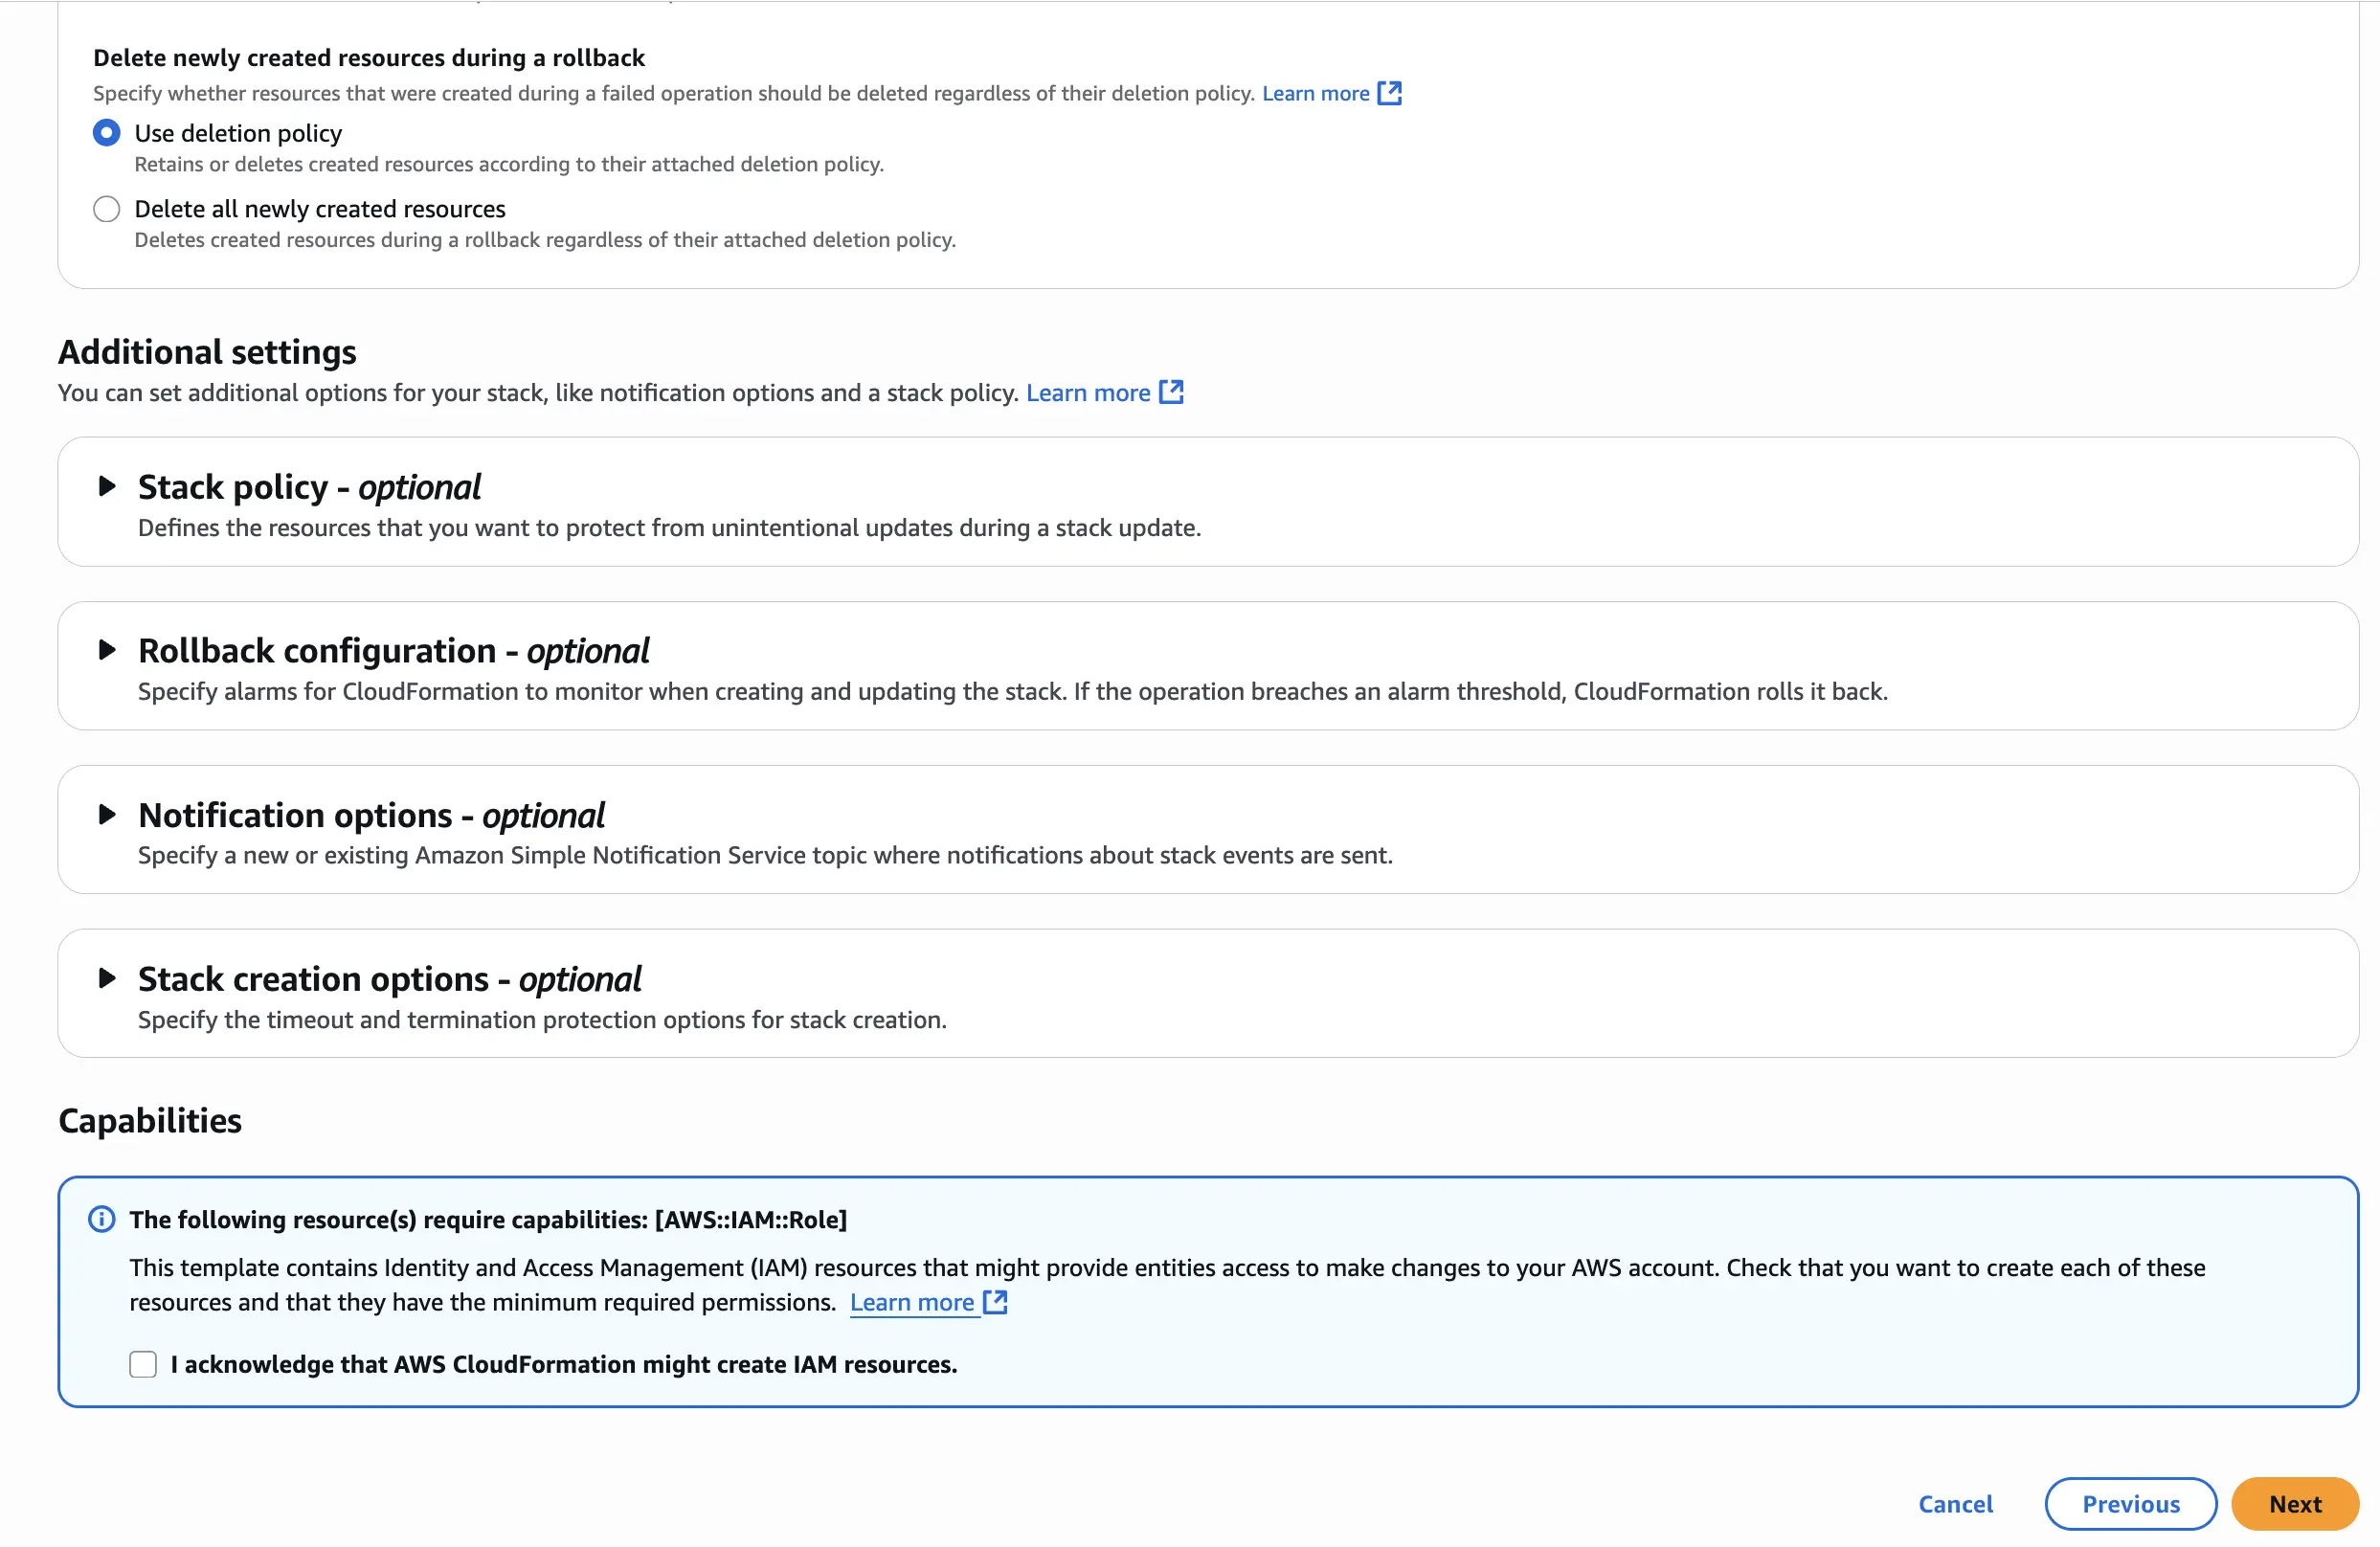
9. On the Configure Stack Options page, select the relevant options. Since this stack uses AWS Lambda, you’ll need to check the box "I acknowledge that AWS CloudFormation might create IAM resources" (IAM permissions are required for Lambda to fetch the latest image). Once done, click Next to continue.
10. On the Review and Create page, you can review the summary of all parameters you’ve entered. If needed, you can edit any of them before proceeding.
11. If the template has been installed successfully, it says Create Complete as per the screenshot below.
12. You can now access the URL addresses for **Dashboard / Origin / Edge and RTMP ** in the Outputs tab.
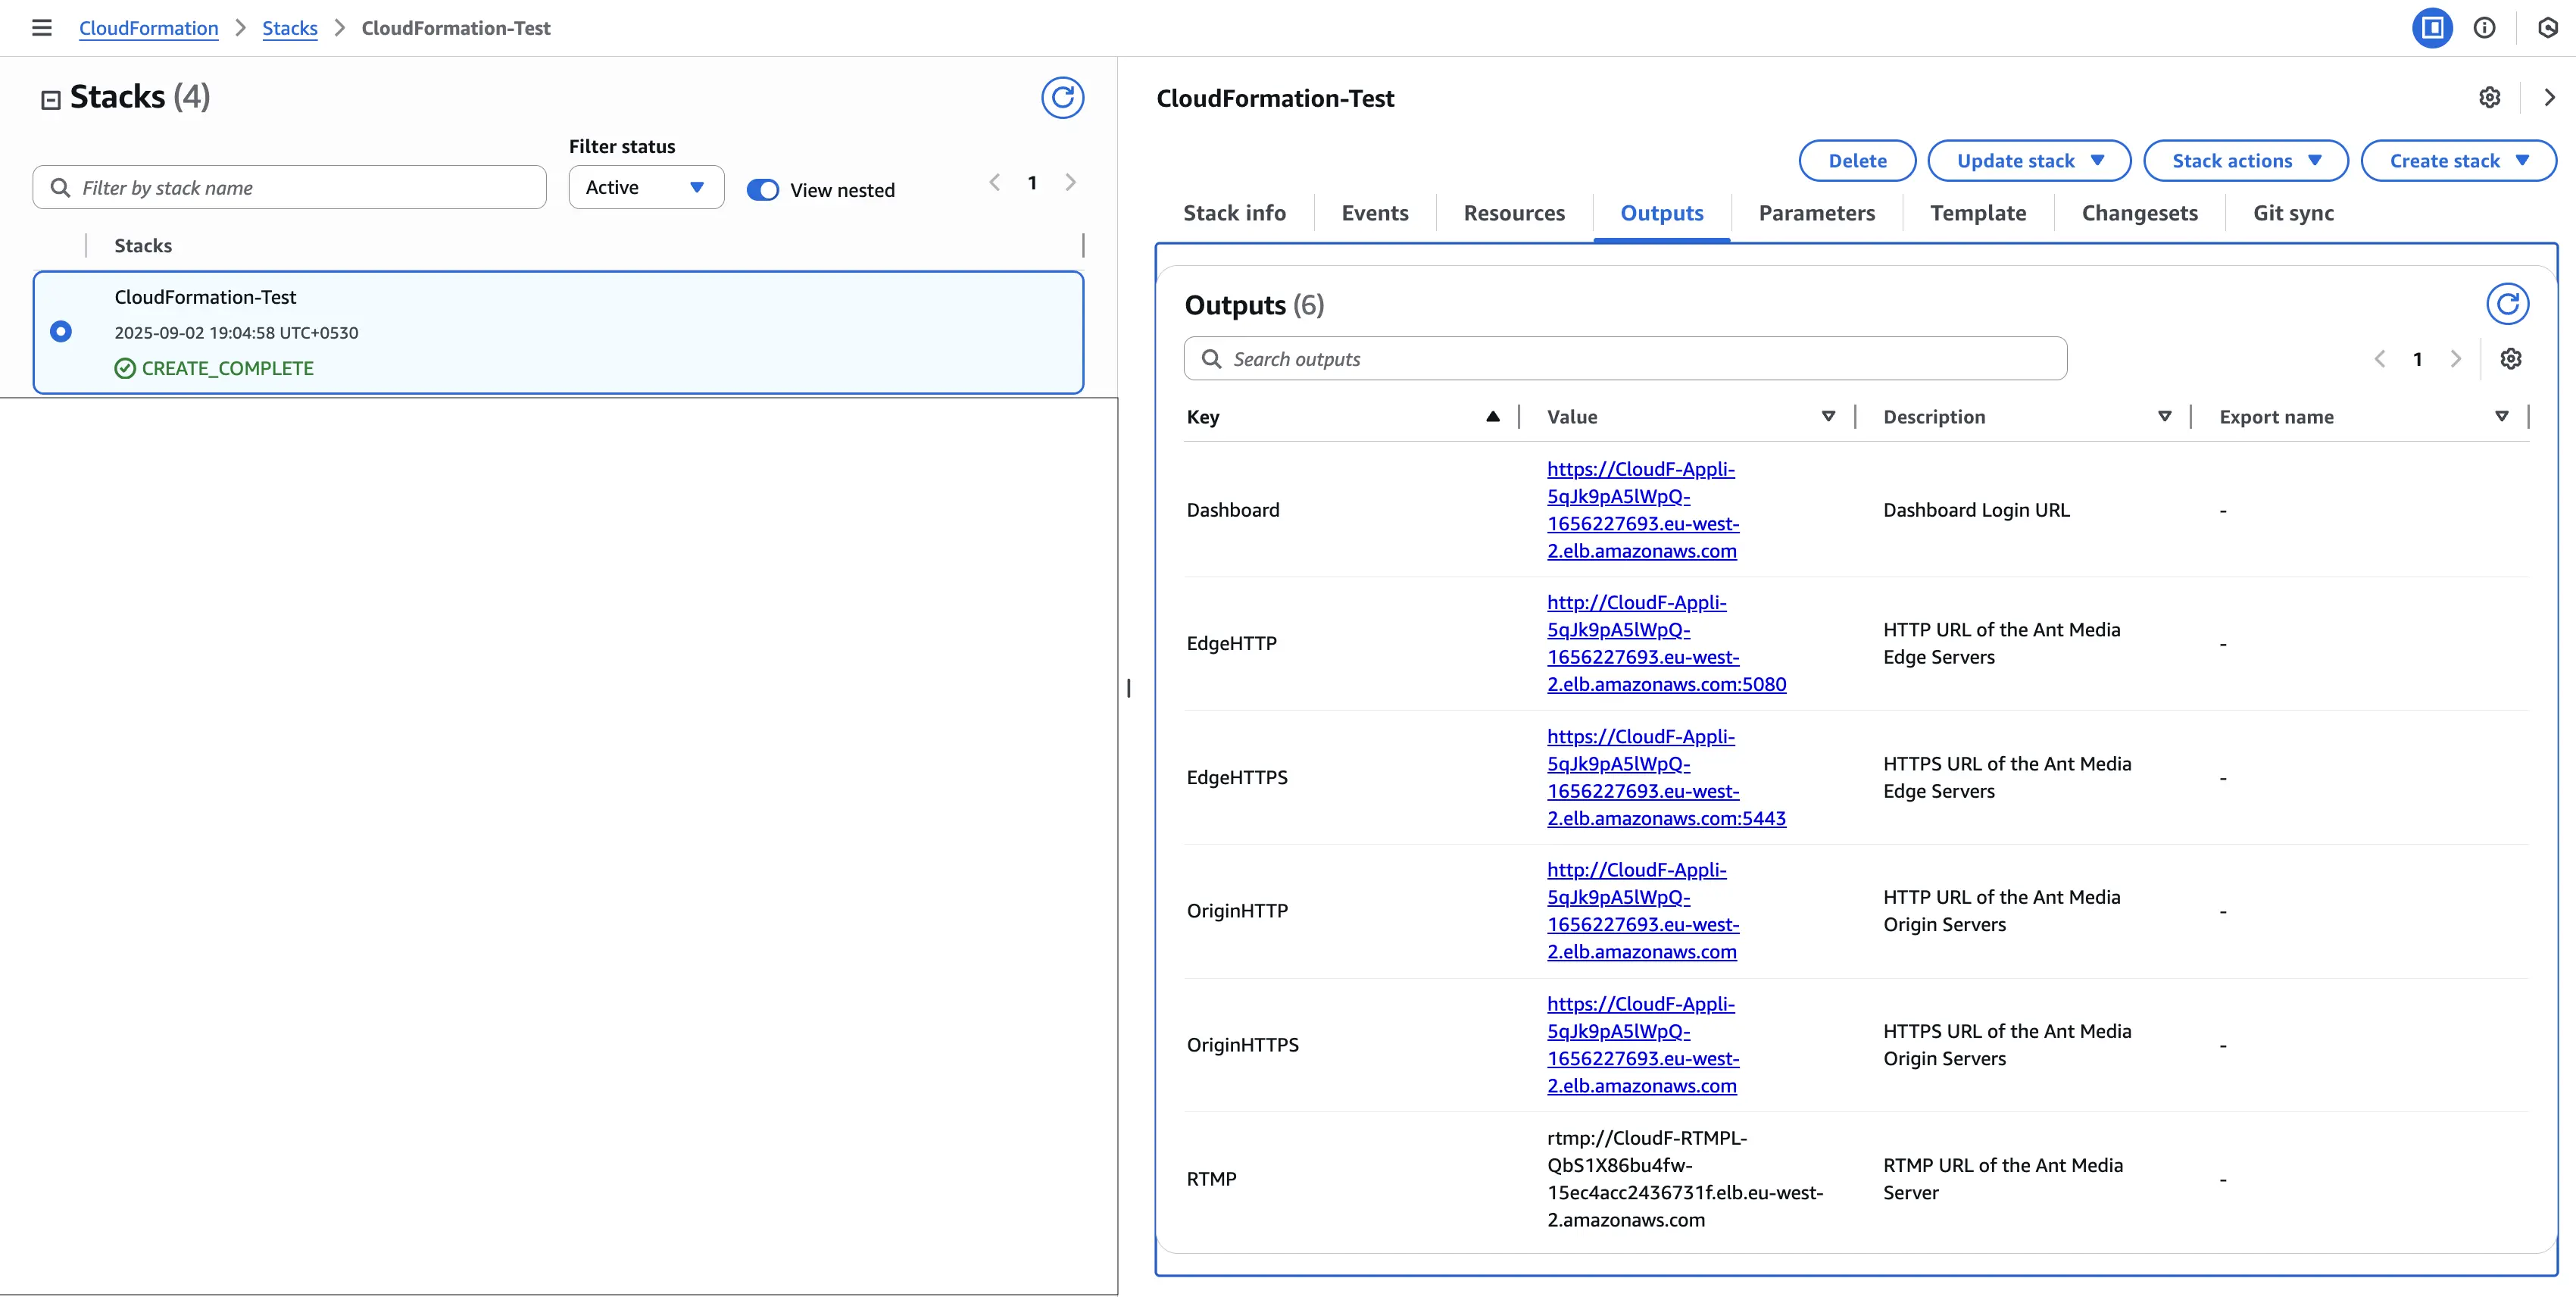
To avoid browser warnings and certificate errors, you must associate your Load Balancer with a valid domain and certificate.
Here’s how it works:
-
By default, the Outputs tab will show you the Load Balancer DNS names (e.g.,
cloudf-appli-xxxx.elb.amazonaws.com). -
These DNS names are functional, but they use an AWS-issued certificate that does not match your custom domain.
-
If you try to open them directly over HTTPS, most browsers will mark them as insecure or show a certificate mismatch error.
-
When deployed the cluster via AWS CloudFormation, there are two Load Balancers deployed: one is
Network Load balancerfor TCP/UDP network traffic and one isApplication Load Balancerfor HTTP/HTTPS traffic. -
So the CNAME records will be created for both Load balancers.
To fix this:
- Define a CNAME record in your DNS (e.g.,
stream.example.com) that points to your Load Balancer DNS name. - Then, request or import an SSL/TLS certificate in AWS Certificate Manager for your chosen domain (Or) If you already have a certificate from another provider, you can also import it into ACM and use it the same way.
- Attach that certificate to your Application Load Balancer’s HTTPS listener.
- For
Network Load Balancer, you do not need any SSL certificate so CNAME can be created directly for it.
After this setup, you’ll be able to access Ant Media Server securely on your own domain (e.g., https://stream.example.com) without any certificate errors and publish the RTMP/SRT stream to another domain, which is mapped to Network Load Balancer.
13. When you enter the Dashboard URL in your browser for the first time, the Ant Media Dashboard will open, asking you to create your account by providing the following details: First Name, Last Name, Email Address, Password, and Confirm Password.

In the screenshot above, you may notice that the Dashboard is accessed using a secure custom domain (e.g., https://cf-automation.antmedia.cloud), while the publish/play examples (at the end of the document) use the default insecure Load Balancer URLs (e.g., https://cloudf-appli-xxxxx.elb.amazonaws.com).
The custom domain shows how SSL works without warnings, while the Load Balancer URL is shown to illustrate the Outputs provided by CloudFormation. You can fix them by following the steps shared above in point number 12.
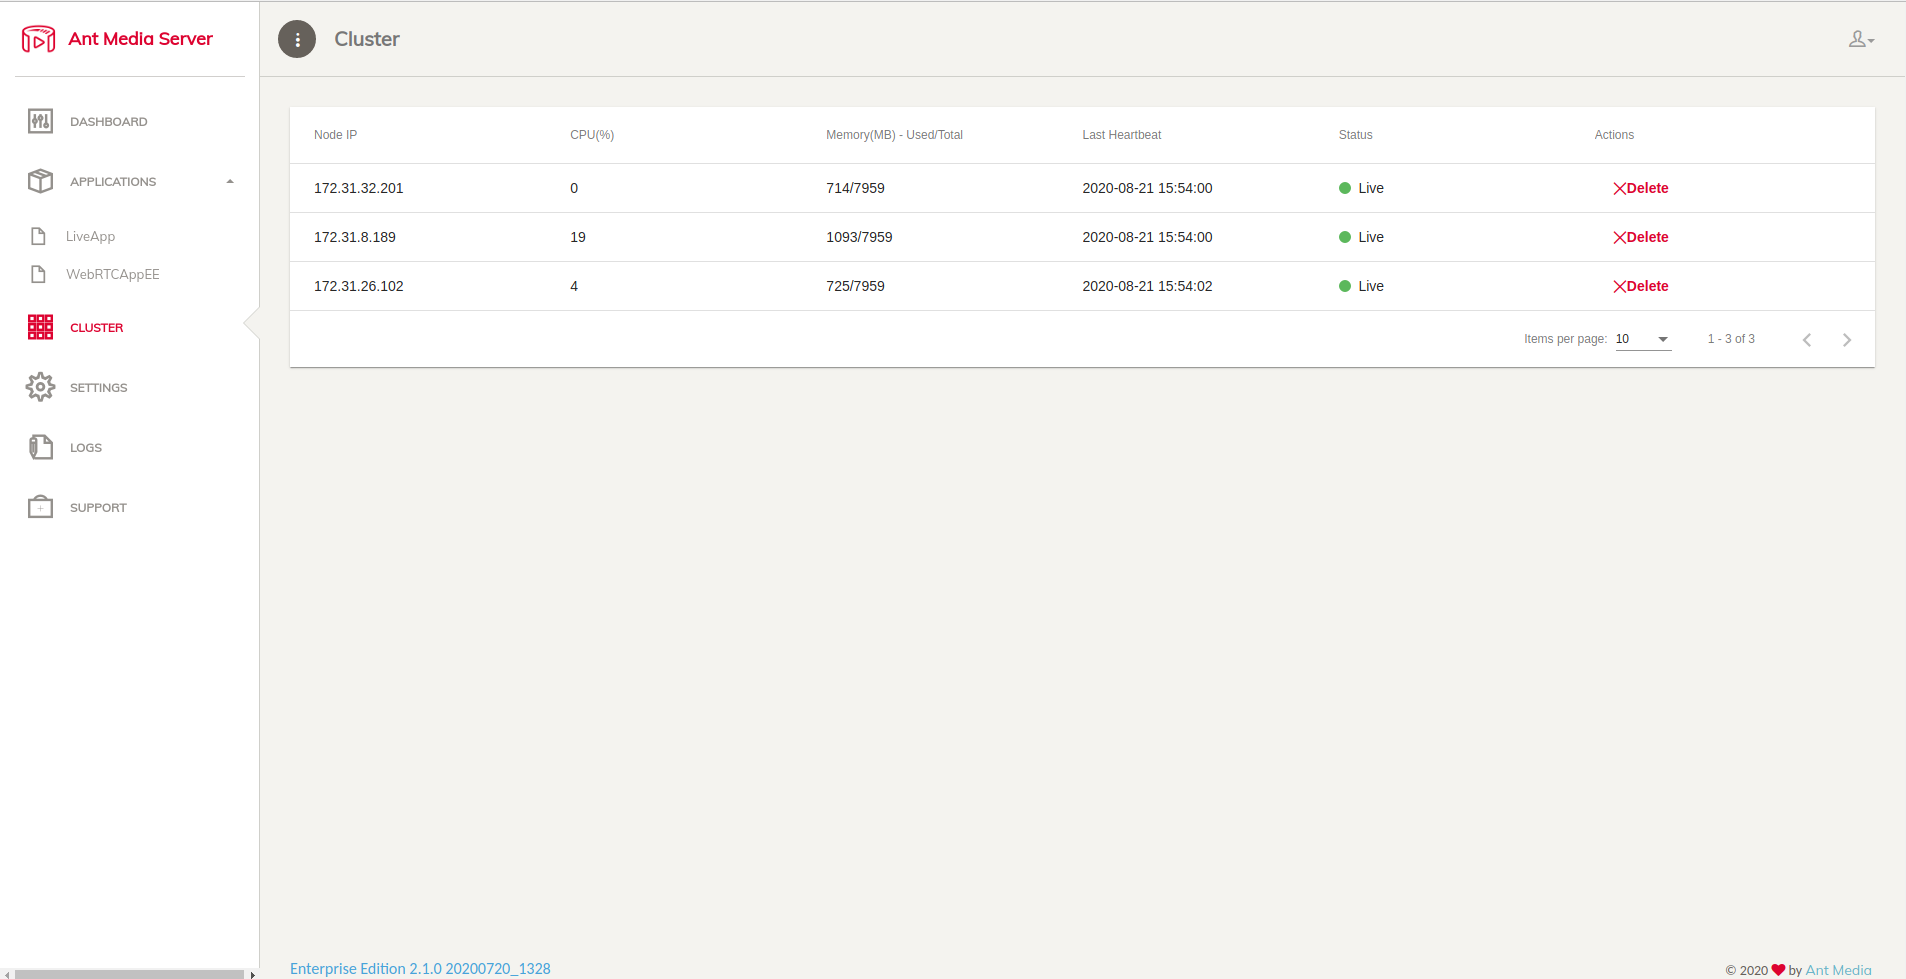
14. Once logged in, When you click on the Cluster tab, you can see the servers in Cluster. The Cluster is ready to use for your Live-Streaming
Tada!! Congratulations!
By now, you’ve successfully deployed Ant Media Server using CloudFormation. While you were sipping your coffee, the template automatically took care of:
- EC2 instance provisioning
- Security Group configuration
- Ant Media Server installation
- Ant Media Server cluster setup (Origin + Edge)
- Auto Scaling configuration
- Load Balancer setup with HTTPS support
- Ready to Publish and Play your desired streams.
The best part?
You don’t have to manually install, configure, or connect anything. With just a few clicks, you now have a fully functional cluster that’s ready to publish and play streams within minutes. You can refer to the below screenshots for reference.
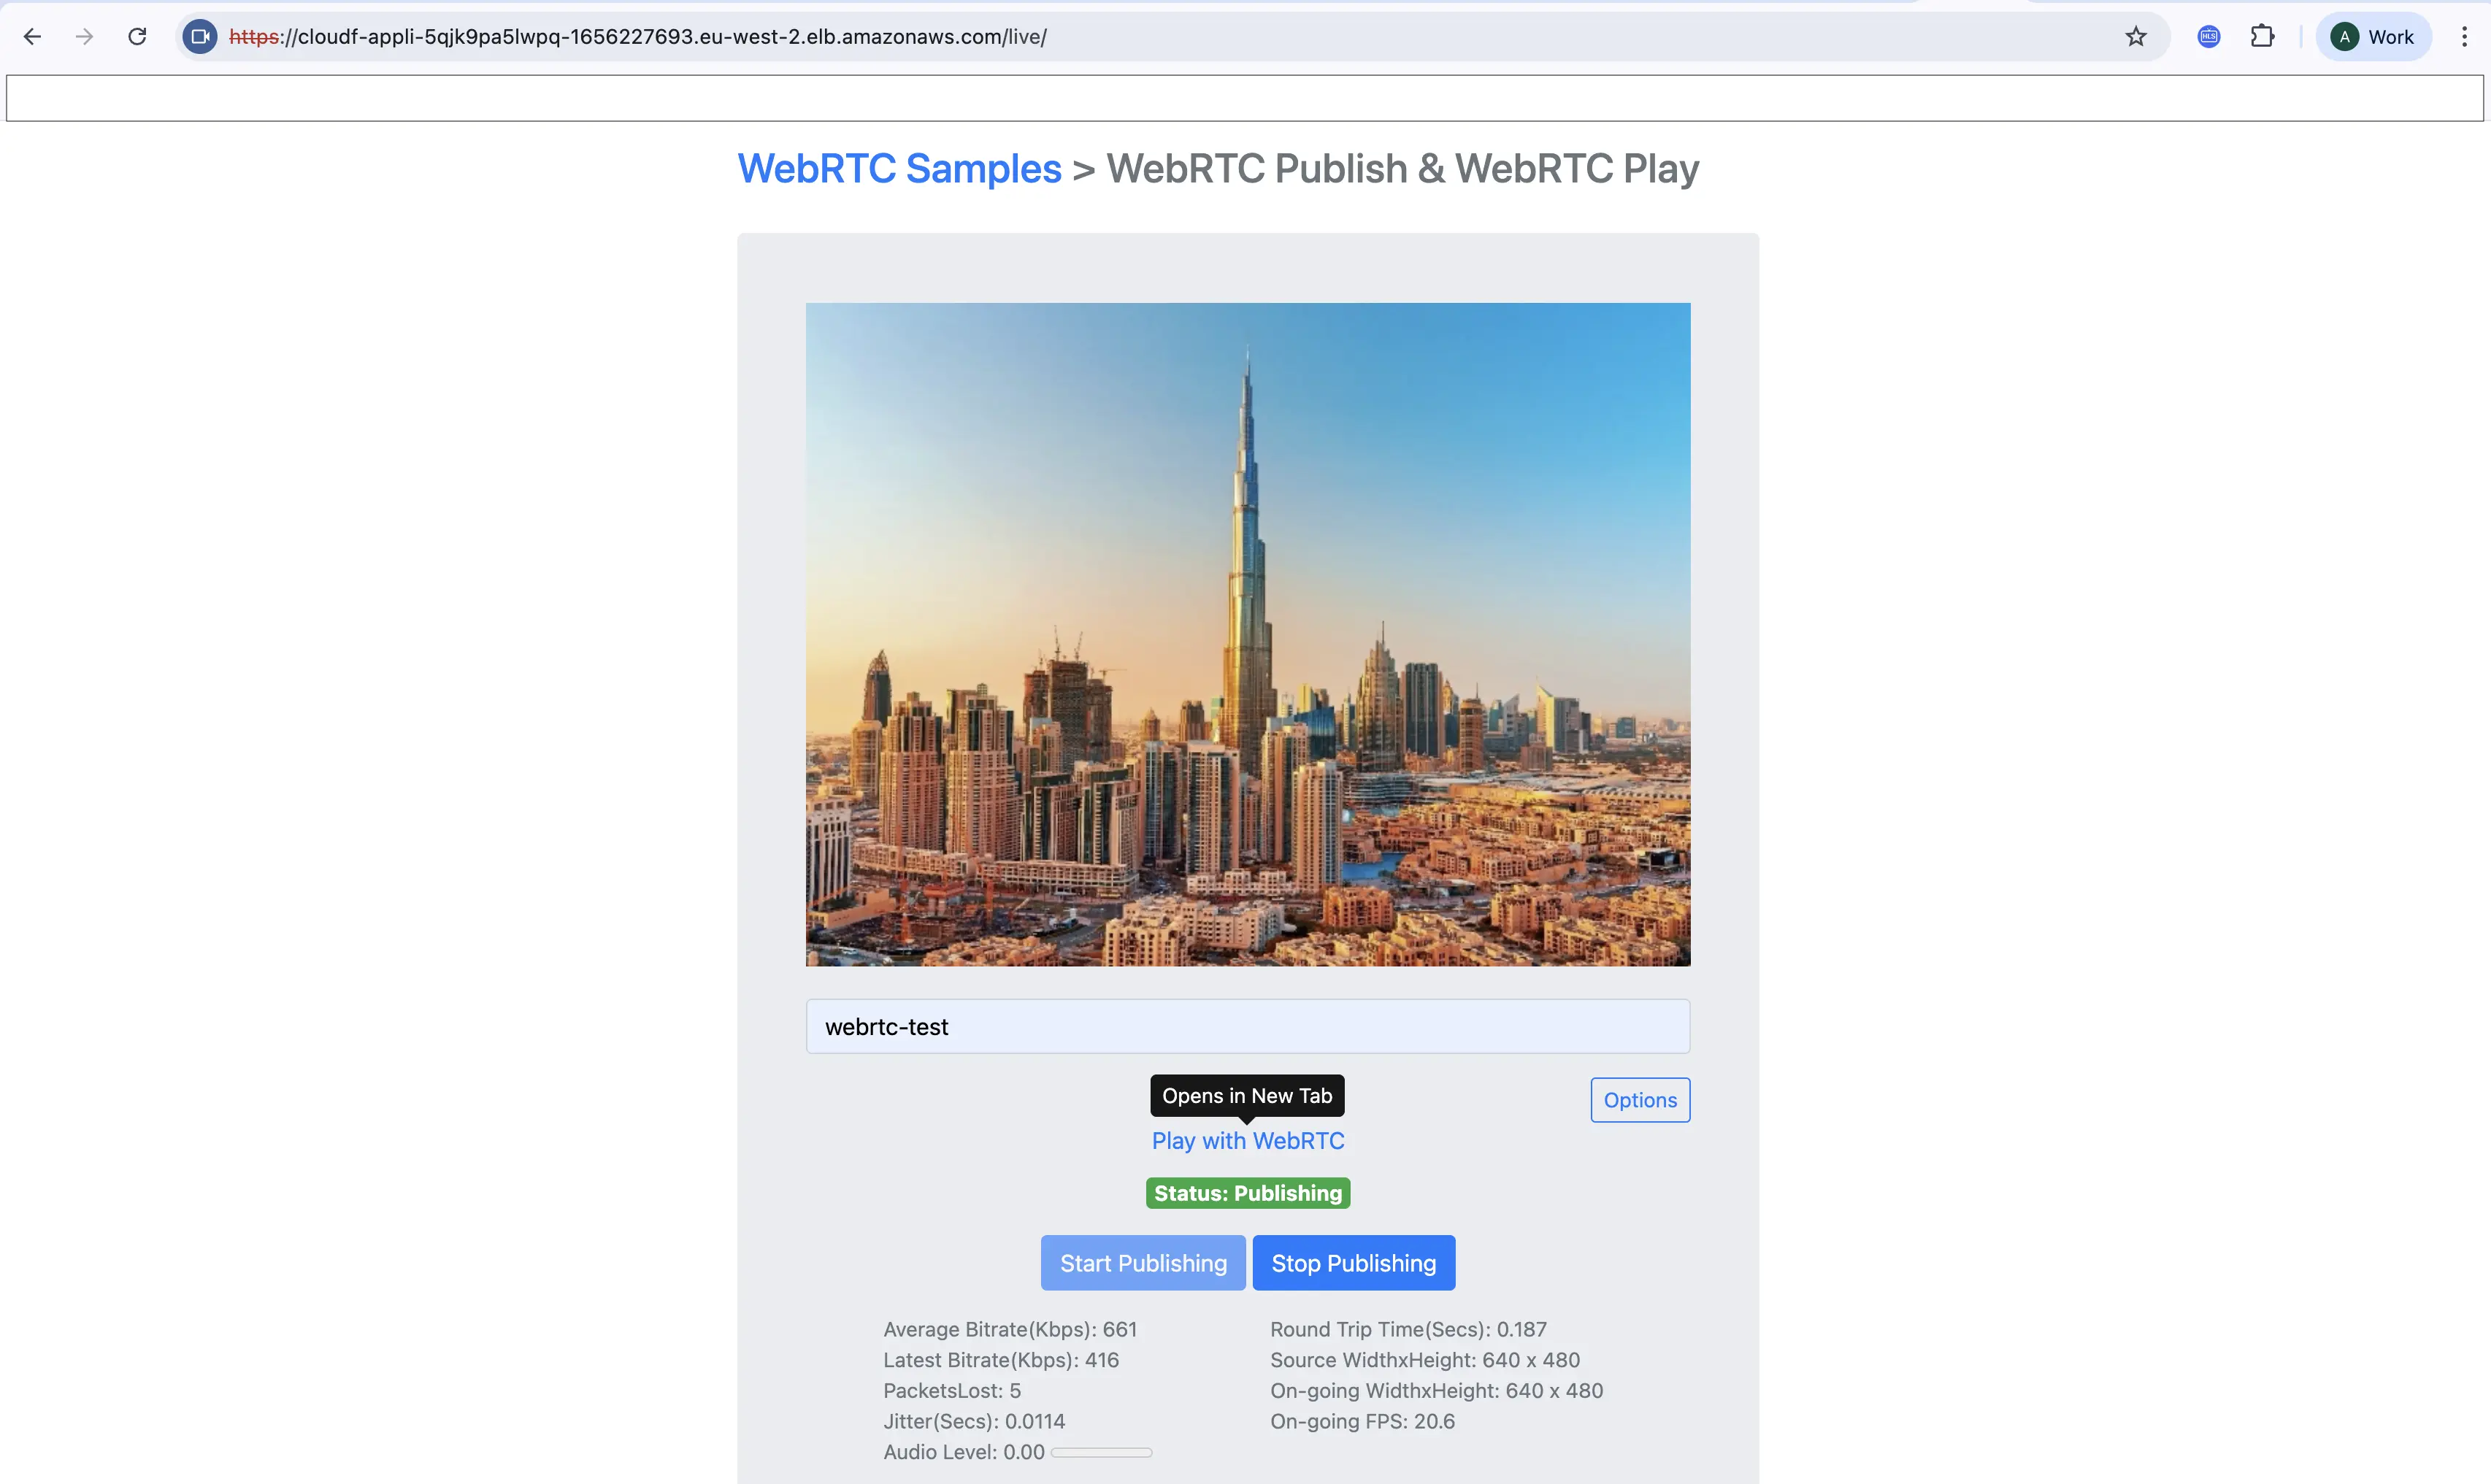
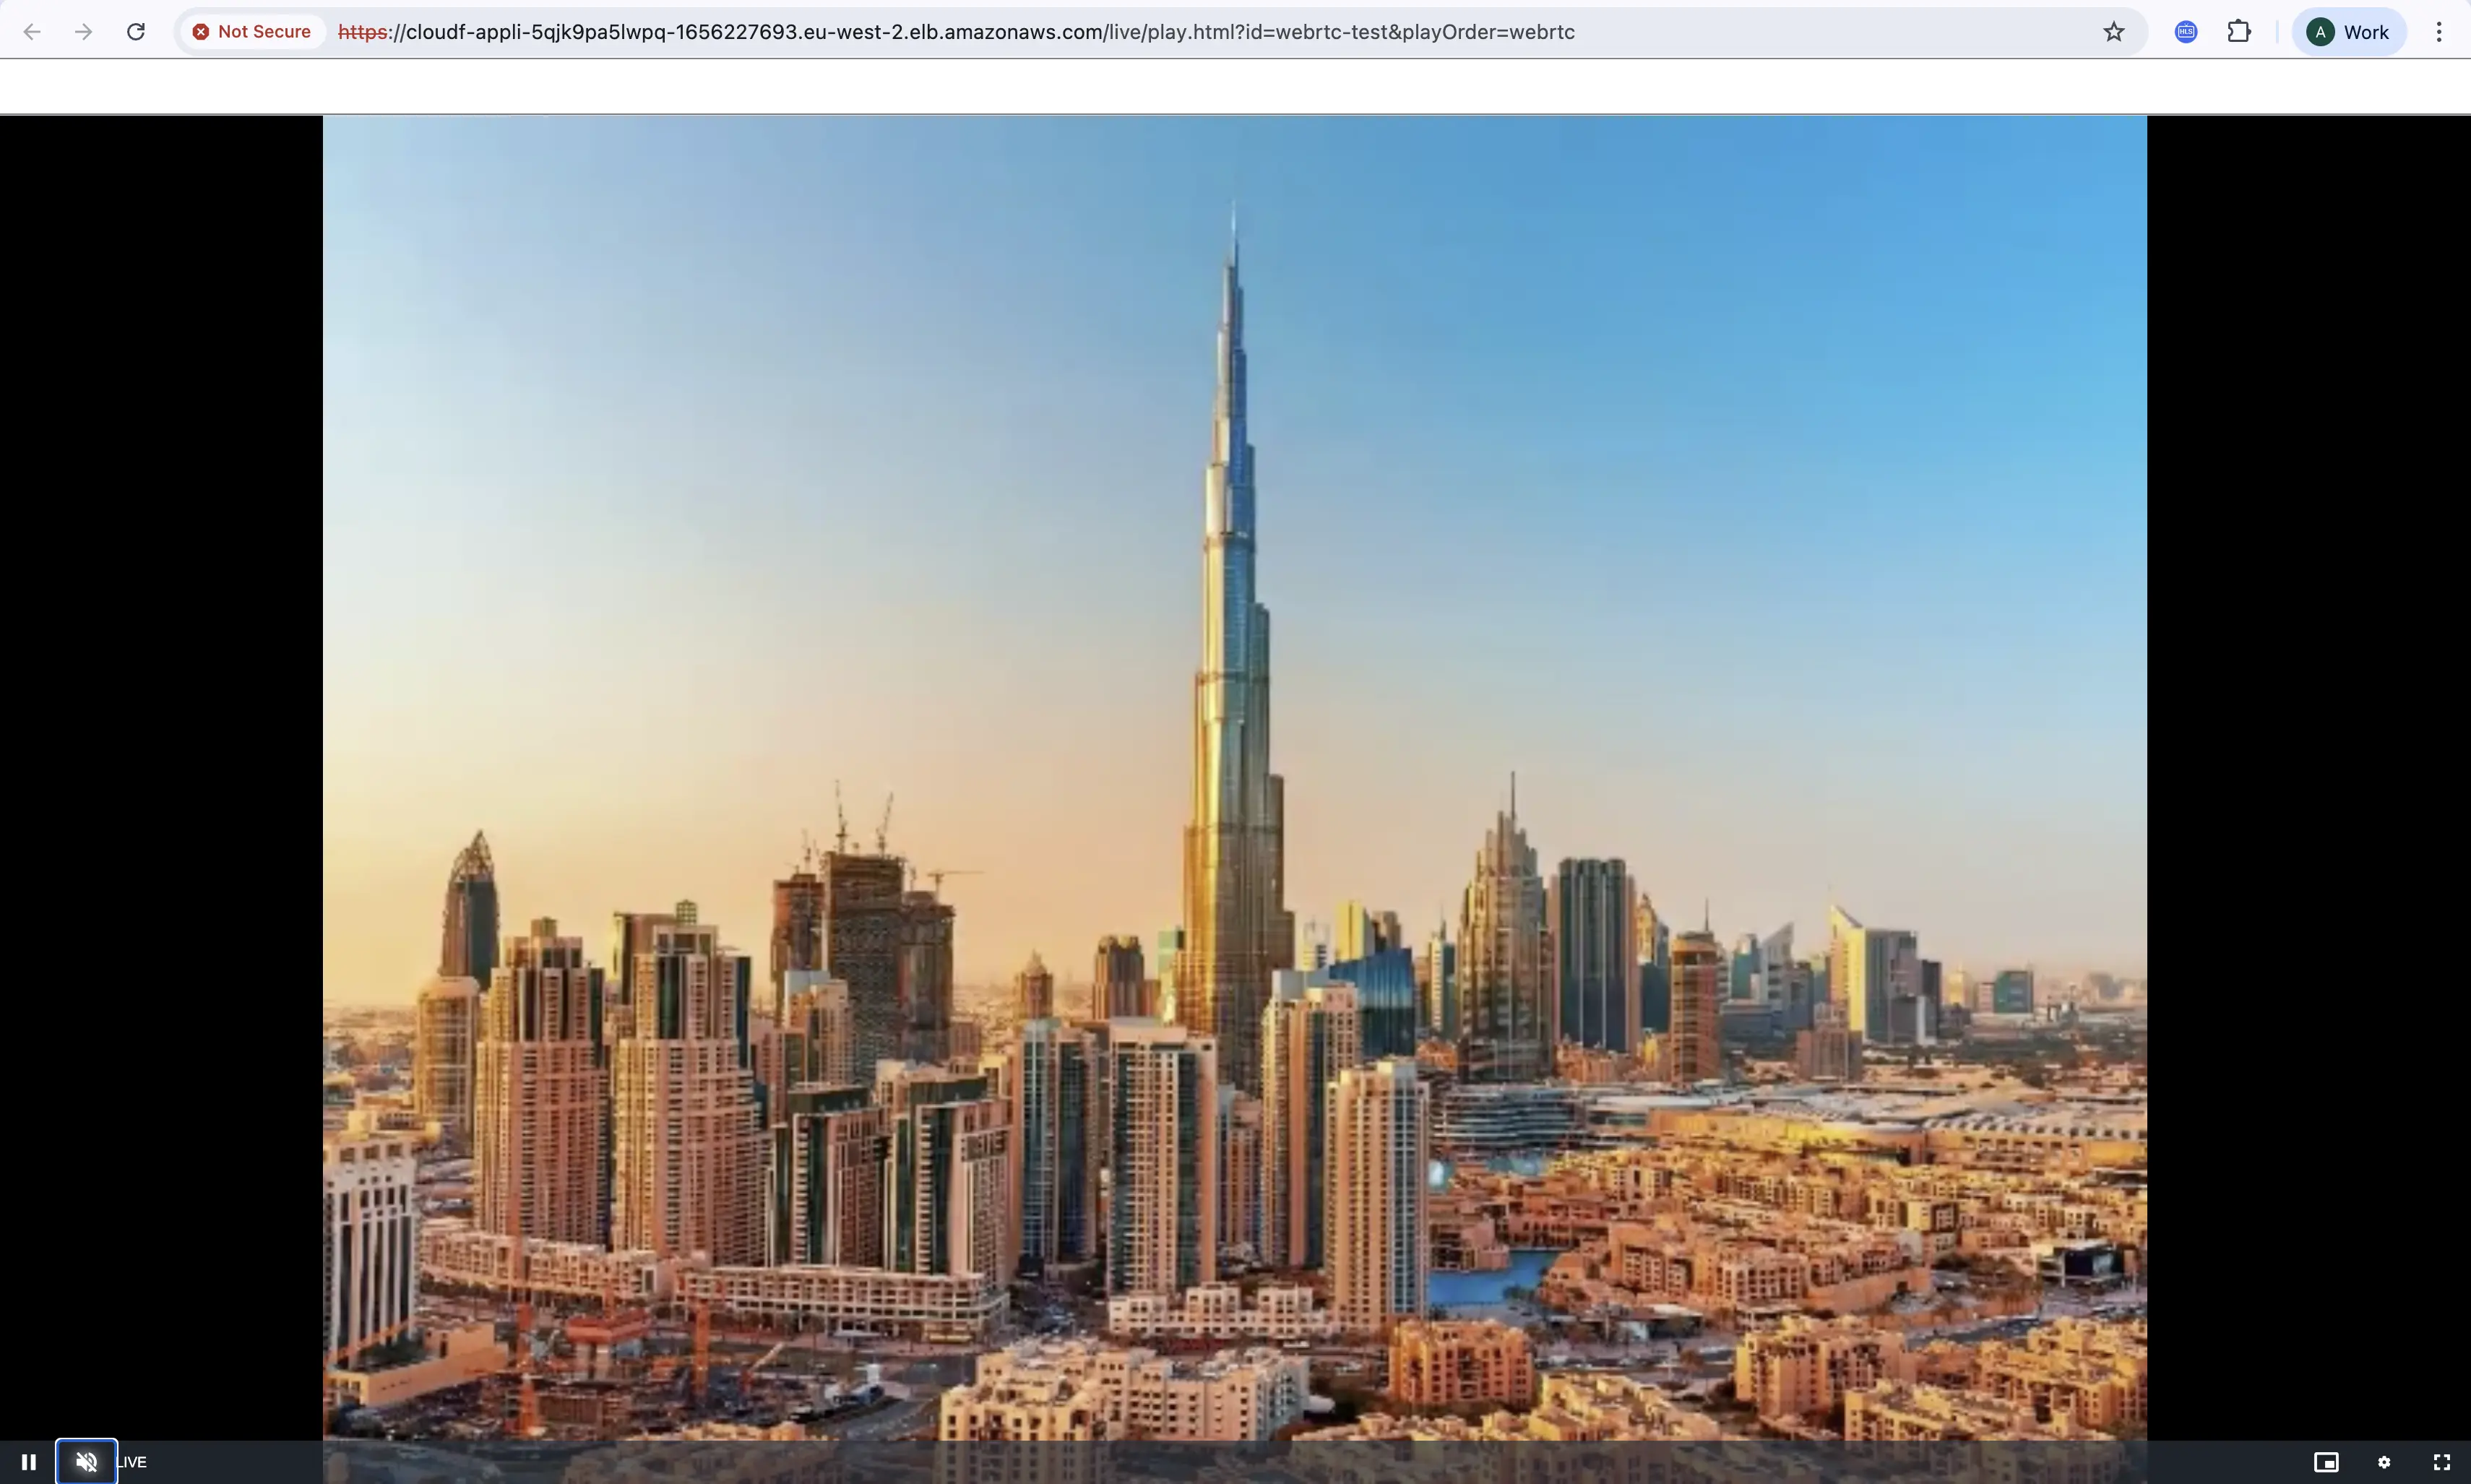
This means you can move straight to testing your live workflows—WebRTC, RTMP ingest (you will have to map a separate domain to the RTMP load balancer for RTMP streaming), HLS/LL-HLS playback — without worrying about infrastructure details.
Delete Stack
When you delete a stack, AWS CloudFormation deletes all resources in that stack.
-7dbae0a830f95595e102577558212ae9.png)
If you have any questions or run into issues, feel free to reach out here: GitHub Discussions.