Accessing the Web Panel
You’ve successfully installed Ant Media Server on your server, now it’s time to manage it using the Web Panel.
This guide introduces the Ant Media Server Web Panel and offers a detailed walkthrough of its settings and menus to help you understand how everything works.
To log in to the Web Panel, open your browser and go to:
http://YOUR_SERVER_URL_OR_IP:5080
After logging into the web panel, the first page that loads is the dashboard.
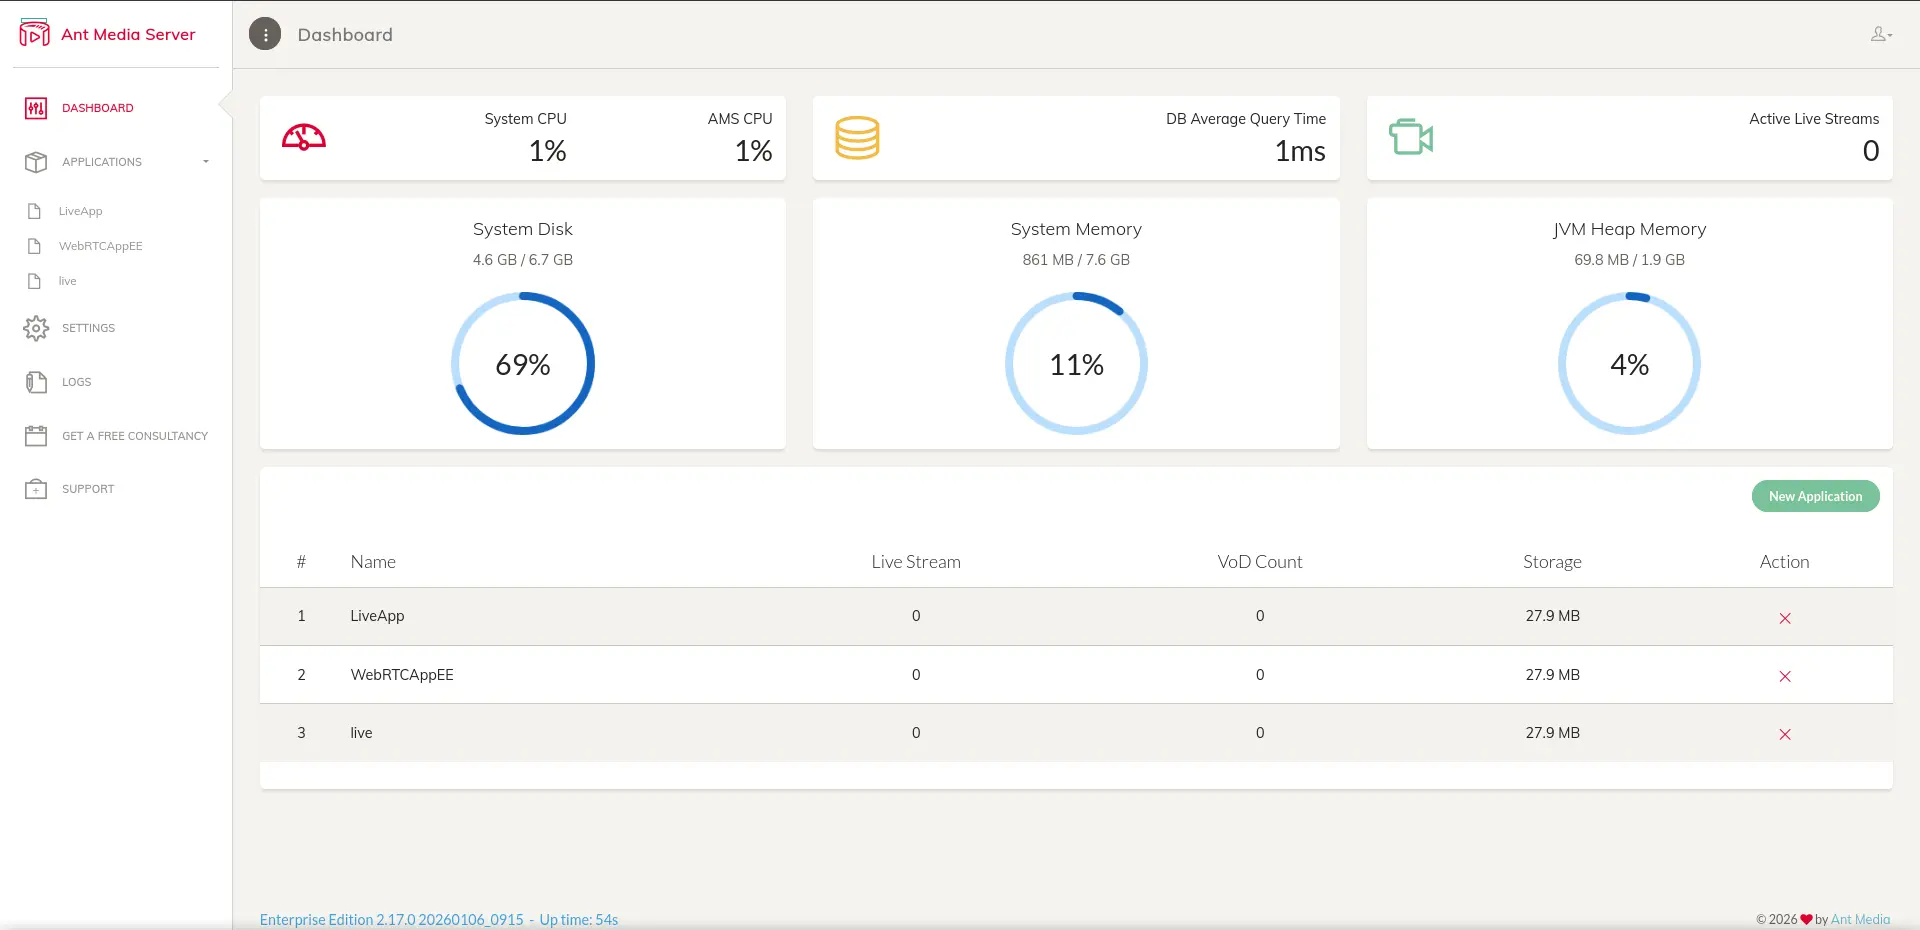
The dashboard provides system information that can be used to measure the health of your instance. Such as System CPU Load, the Number of Active Live Streams, System Disk, System Memory, and JVM Heap Memory.
Seeing high memory or CPU usage is an indication of a problem that needs to be addressed. Its highly advisable to keep the system CPU and memory below 75%; otherwise, you’ll likely experience some issues, such as your instance crashing or live streams failing.
Applications
Ant Media Server comes with three default applications: LiveApp, WebRTCApp and live in the community edition, and WebRTCAppEE ( in lieu of WebRTCApp) in the enterprise edition. All applications are open source.
The application holds sample pages for publishing and playing live streams. You can also test the sample pages via WebRTC samples on the website. Each application functions independently of each other and holds their own settings and configuration options.
All the installed applications are listed in the left-hand menu under the APPLICATIONS section. Clicking on one of the application names loads a page that contains three tabs: Live Streams, VoD and Settings.
It’s also worth noting that the name of the application does not hold any significance other than its identity. Each application is exactly the same; it is simply the settings that can differentiate between them.
The three default applications that come loaded with Ant Media Server are exactly the same.
Live Streams
As you can see in the screenshot below, live streams are listed under the Live Streams tab.
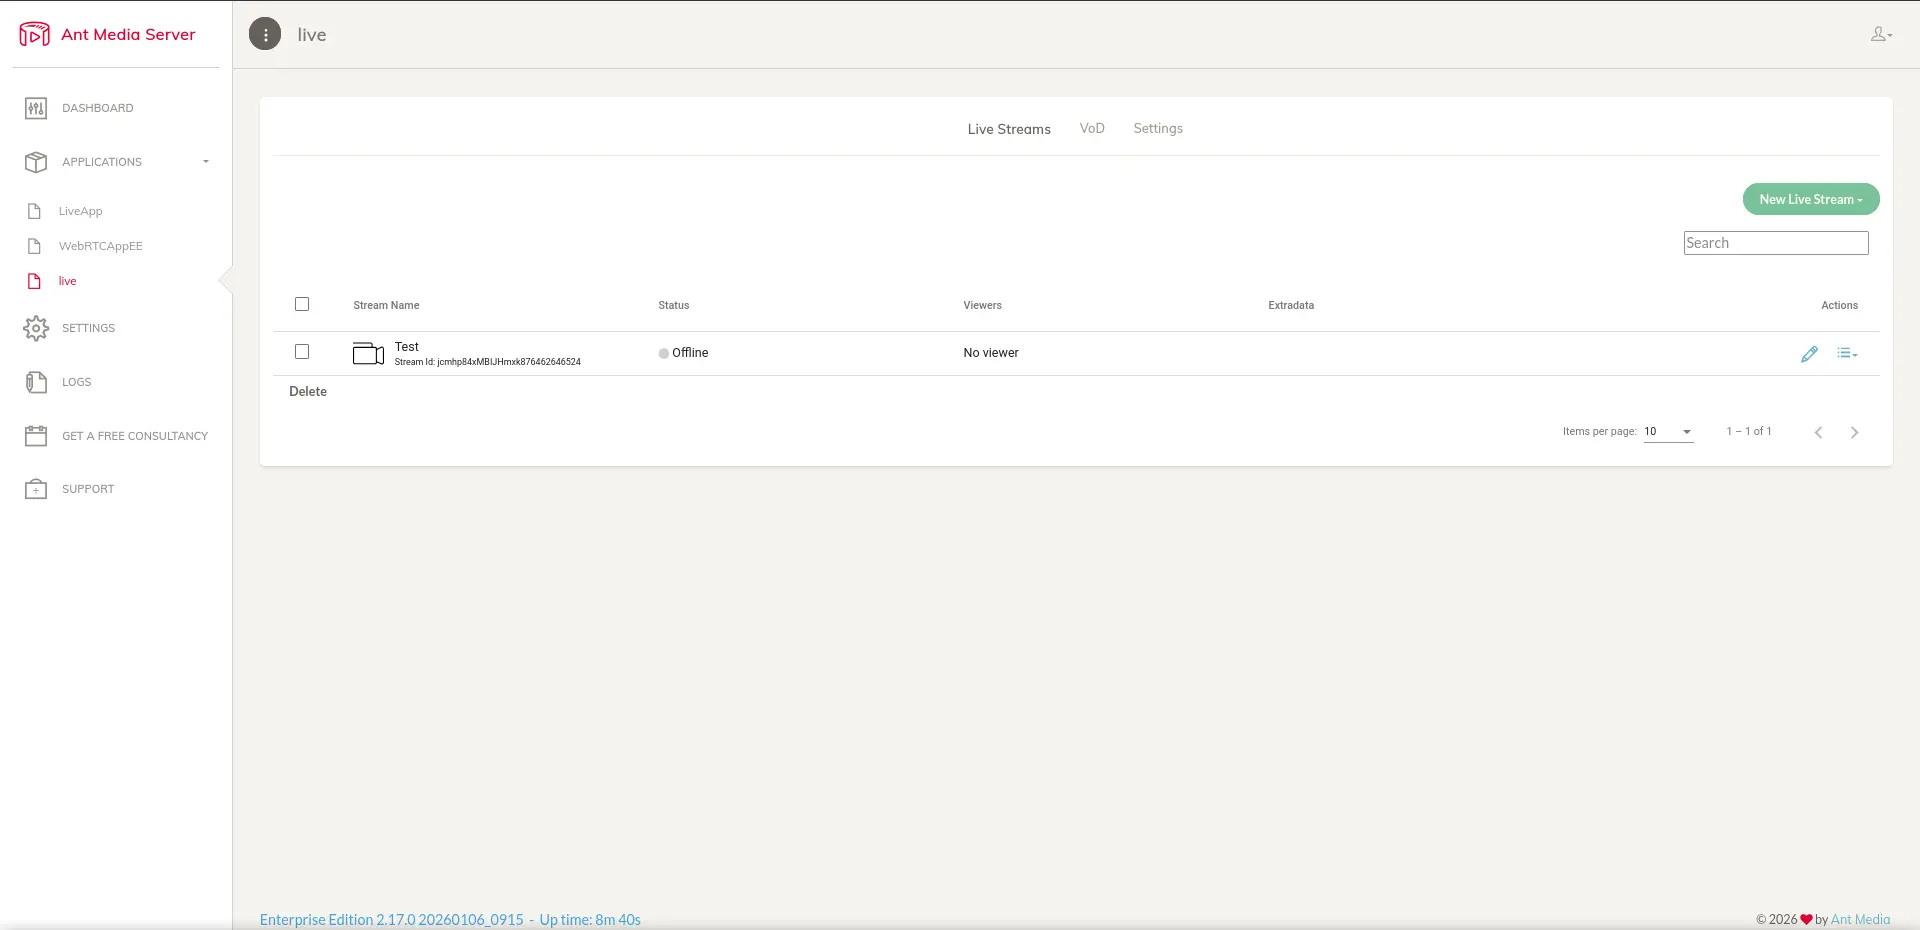
Details for each live stream include the stream name, streamId , stream status (offline/broadcasting/Latency), the number of viewers of the live stream by playback type (WebRTC, HLS, DASH), and the action button menu.
Action Menu
The action menu provides links for additional settings on the actual live stream.
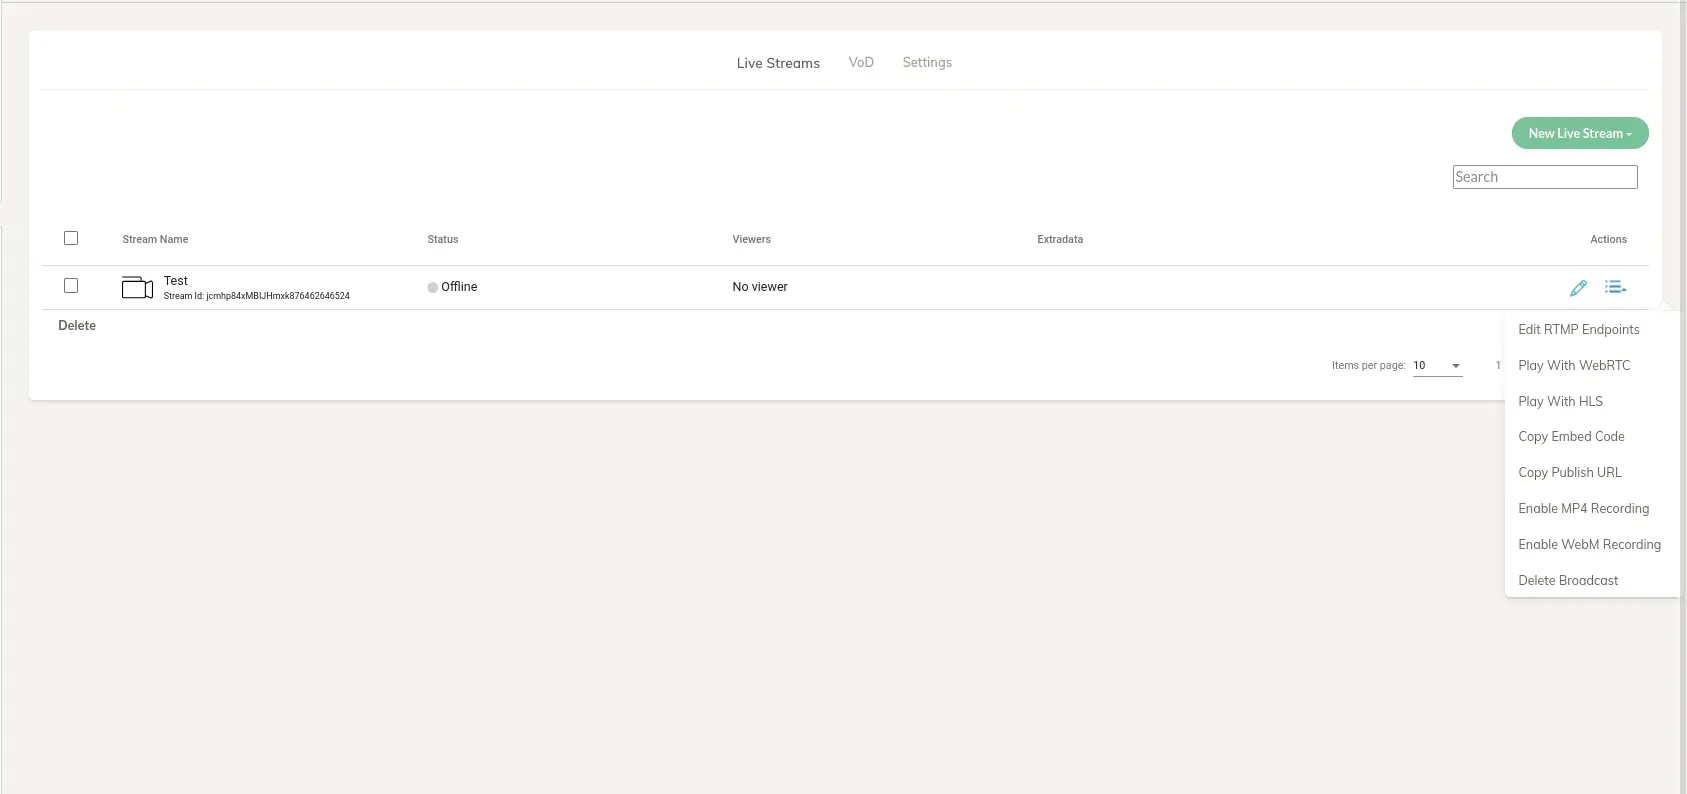
From this menu, you can enable MP4 or WebM recording, edit RTMP endpoints for simulcasting, copy the RTMP publish link for the stream, copy the Embed code and play with HLS/WebRTC.
RTMP Endpoints
Simulcasting, or multicasting, as it is referred to, is when you can forward your live stream to other RTMP endpoints such as YouTube, Facebook, etc.
There isn’t any limit to the number of RTMP endpoints you can add and it enables you to reach a wider audience with your live streams.
You can read more about simulcasting in our documentation.
Copy Publish URL
Quite self-explanatory, the publish URL is the RTMP URL you need to publish to your live stream using the RTMP protocol. The URL is prefixed with the live streamId, so in some encoders, you might need to extract it to add it to a stream key field.
Here is an example:
rtmp://ant-media-server-url/[application]/[stream_id]
From my local installation of Ant Media Server, here is a real example of a publish URL from a live stream under the LiveApp application.
rtmp://localhost/LiveApp/c5cLv2CUG9FJ1684419013643
Copy Embed Code
The embed code is a simple iFrame that loads the AMS default player play.html and pre-populates the query parameters to match those of the live stream you have selected.
You can use the embed code to embed the player into your website or any other external application that can accept an iFrame.
Its another tool to enable you to reach a wider audience.
Here is an example embed code taken from my local installation:
<iframe width="560" height="315" src="http://localhost:5080/live/play.html?id=jcmhp84xMBIJHmxk876462646524" frameborder="0" allowfullscreen></iframe>
As you can see, the play.html page accepts the parameter name which expects the streamId. For more details about embedded player, check out this document.
Enable WebM/MP4 Recording
Live streaming recording will only work if it has been enabled in the application settings under the Stream Recording section.
Furthermore, each format requires you to enable the appropriate codec in the settings.
WebM recording is only available if the VP8 codec is selected and similarly, MP4 recording is only available if the H.264 codec is enabled.
The appropriate checkbox will appear when each encoder is selected.
Setting MP4 or WebM recording
More is detailed regarding the different supported codecs further down in this post.
Play with WebRTC
Plays the stream in a new tab using the play.html application with the WebRTC protocol being prioritized (&playOrder=webrtc)
Play with HLS
Plays the stream in a new tab using the play.html application with the HLS protocol being prioritized (&playOrder=hls)
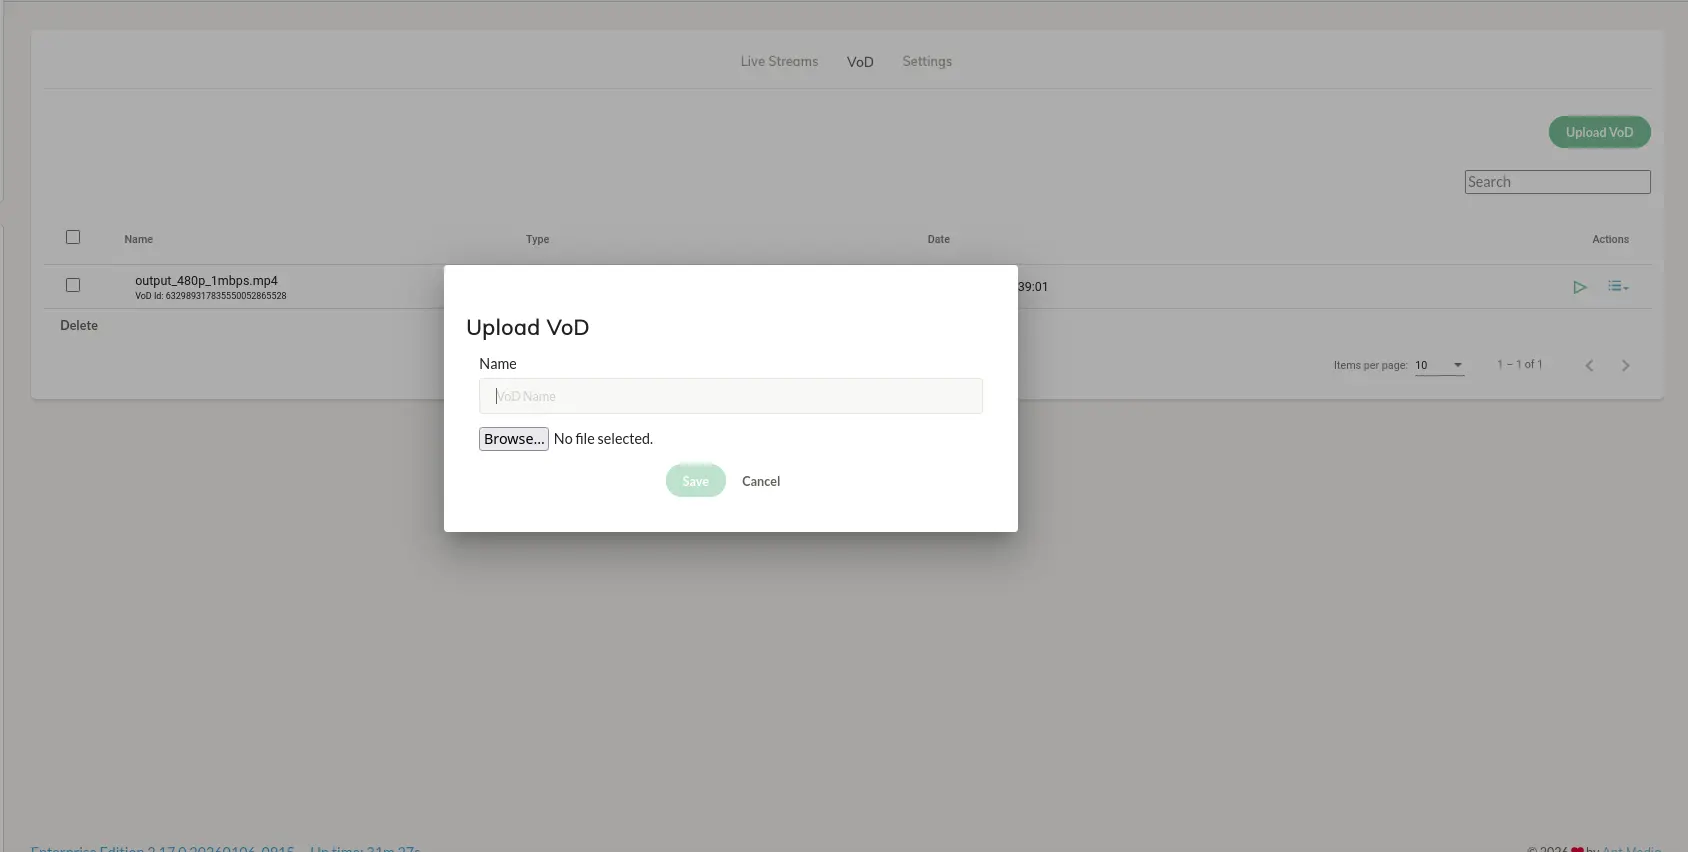
VOD Assets
The VoD tab loads all the recorded streams and uploaded VoD assets, as seen in the following screenshot:

You can upload a video file using the Upload VoD button:
Application Settings
Under the Settings tab, the application settings screen loads and here it’s possible to configure stream behaviour.
Let’s go over the sections of the Settings tab.
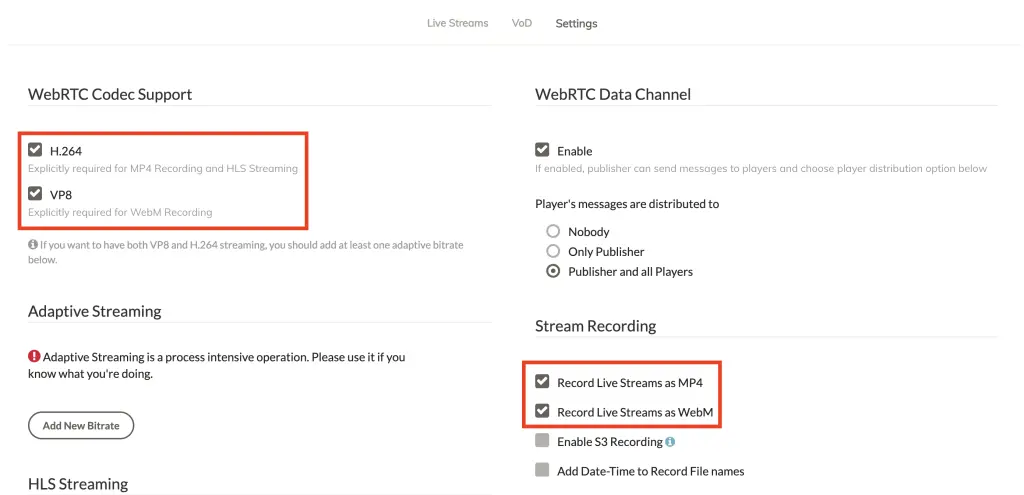
WebRTC Codec Support
Ant Media Server supports H.264, H.265, and VP8 video codecs.
H.265 can be enabled via the properties file, which is explained in this blog post. Starting with v2.6.2 of Ant Media Server, all properties can be set via Advanced Settings from the web panel. Check out more details here.
Please keep in mind that if you enable both H.264 and VP8, you will need to add adaptive streaming to ensure that the stream is encoded by both codecs. If you only enable one of them, you do not need to enable adaptive bitrate streaming unless you require it.
Adaptive Bitrate Streaming
Ant Media Server supports adaptive bitrate streaming. Please visit here for more information.

HLS Streaming
Ant Media Server supports HLS. This section allows the customisation of the Segment List Size indicates the number of TS files generated for HLS at a given time on the server and Segment Duration refers to the length of time for each TS file.

Advanced Setting
Here, you can enable advanced settings on your application, such as Object detection, and automatically generate previews.
Please note that you need to add adaptive streaming if you want to use these features.
You can also customize the folder where VoD assets are saved by setting VoD Streaming Folder to the location of your choice.
Finally, you could specify a Webhook URL so that events generated from your Ant Media Server instance are sent to an external process. Read this guide for more details about webhooks.

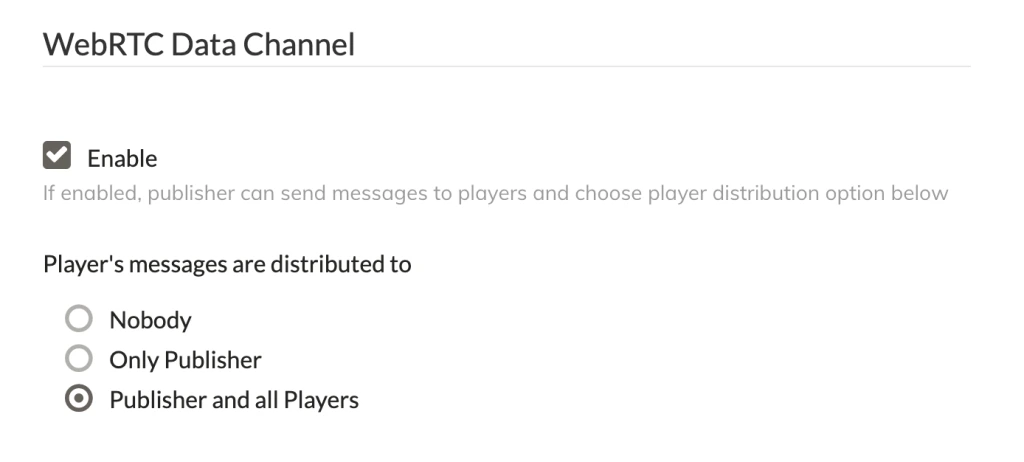
WebRTC Data Channel
The data channel enables the sending and receiving of data to create functionality such as a live chat. In this section, you can enable or disable the data channel depending on your needs.
Furthermore, you can configure how messages are delivered to the players.
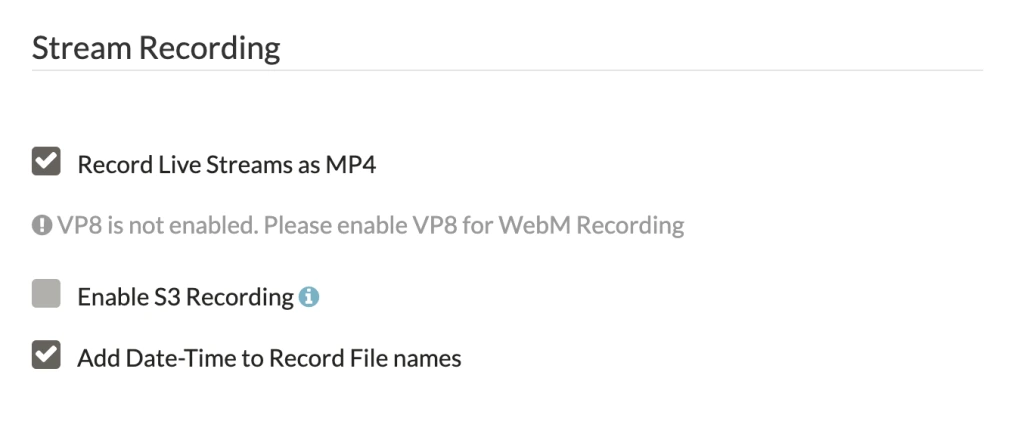
Stream Recording
As already detailed above, when going through the actions menu on the live stream, recording your live streams is not enabled by default.
If this is something you will need, then make sure to check the box against the type of video file you need.
Recording in MP4 and WebM is supported; however, you need to enable H.264 to record in MP4 and enable VP8 to record in WebM format.
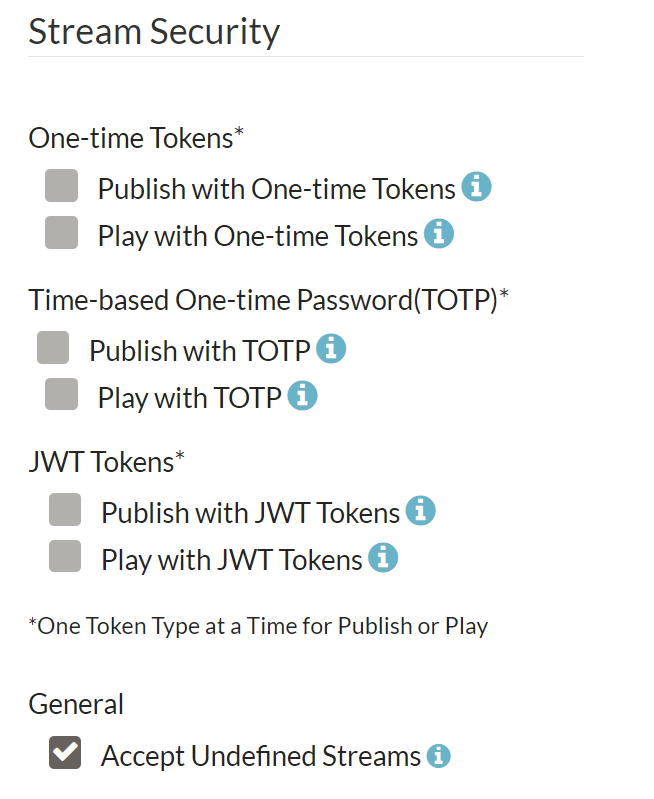
Stream Security
Anyone can publish and play live streams if they have get hold of the URL to the publish and play pages.
-
To make your live streams secure, security features such as One time tokens can be enabled. You can create a one-time token for publishing or playing live streams. One time tokens are designed to be used only once. For instance, once the token has been used, it will no longer be valid.
-
However, the TOTP based tokens are designed to expire after a certain amount of time.
-
Generally, you’ll want to create your live streams before broadcasting. However, there may be instances where you’d like to accept incoming live streams that have not been defined. This is where you’d want to enable the option to Accept undefined Streams.
-
More stream security can be enabled by using a JWT filter for the live stream. You can enable the use of JWT tokens for both the playing of live streams and the publishing of live streams. You can use the JWT token for a longer time duration and it can be used n number of times in that duration.
-
Other than the above security types, there is one more token, which is Hash-Based token. The hash-based token can also be used for a longer time duration but there is no expiration time.
It adds an extra layer of security to ensure that only those that you want to publish and play live streams on your instance are granted permissions.
REST API Security
If you intend to interact with the REST APIs on a different server than where the Ant Media Server instance is installed, you’ll want to add additional IP filters so that API requests are not blocked.
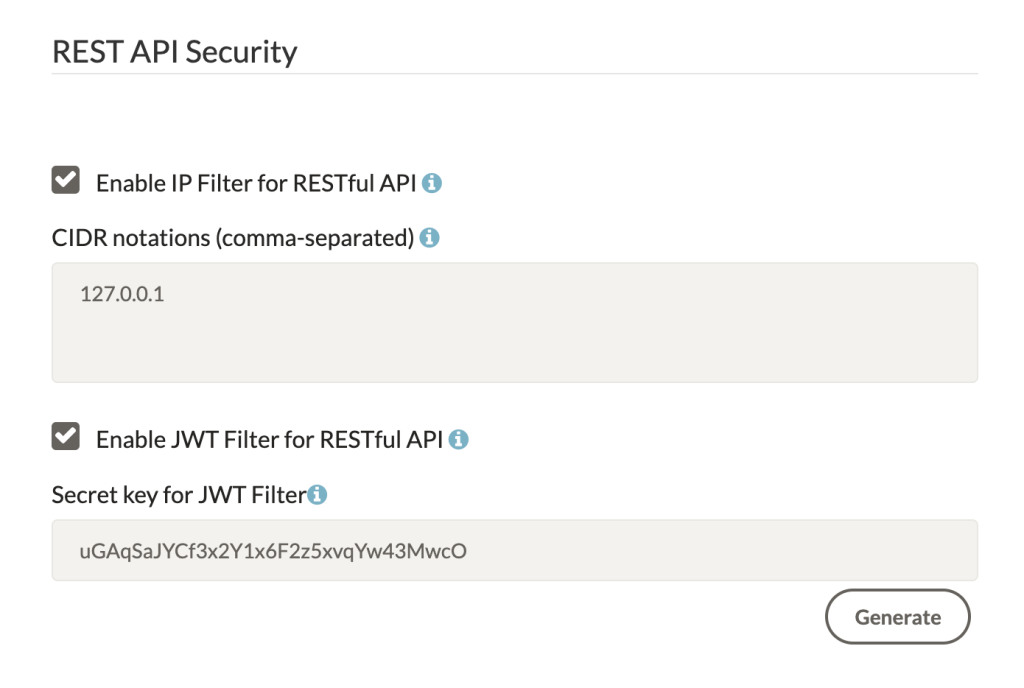
For more details about the Rest API, check here. As you can see in the below image, there are two filters for APIs: one is an IP filter for the Rest API, and the other is a JWT filter for the Rest API.
Whitelisting IP addresses can be done in the Enable IP Filter for RESTful API section and accepts a comma-separated list of IP addresses.
The default IP address is localhost (127.0.0.1) and is needed because the main management web panel built from AngularJS is granted access to the API with this setting.
If you remove the localhost IP address from the REST API filter, then the management web panel will not function.
But in the case of the JWT Filter for Rest API, you do not need the IP to whitelist. You need to generate the JWT to call the Rest APIs. You can get detailed information from the documentation.
Conclusion
The Ant Media Server Web Panel gives you a powerful, centralized way to monitor, configure, and scale your streaming workflows. From tracking system health on the dashboard to managing live streams, VoD assets, codecs, adaptive bitrate, recording, and security, every major aspect of your instance is accessible in one place.
By understanding how applications, stream actions, settings, and security controls work together, you can fine-tune performance, improve reliability, and protect your streams from unauthorized access. Whether you’re building a simple live streaming setup or a large-scale WebRTC platform, the Web Panel provides the tools you need to operate efficiently and confidently.
As a next step, explore the linked guides for adaptive streaming, security, and REST APIs to integrate Ant Media Server more deeply into your own applications and workflows.